Feeds:
Posts
Comments

Archive for the ‘Cookies’ Category

Sarah Bernhard Kager

Sarah Bernhardkager

Sarah Bernhardkager are famous danish cakes developed by pastry chef Johannes Steen in Copenhagen, Denmark back in 1911. The cakes are named after the famous french actress Sarah Bernhard who visited Copenhagen in connection with her book release and so the cakes were created in her honor. The Sarah Bernhard cake is a macaroon cookie topped with a rich genache, covered with melted chocolate and the original cake was decorated with a small candied violet flower. The cake is a decadent treat.

Making Sarah Bernhard Cakes

Making Sarah Bernhard Cakes

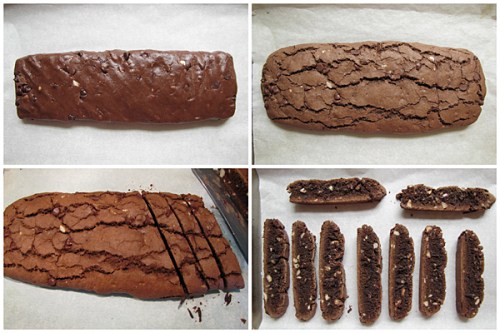
This recipe makes approximately 40 macaroon cookies. The extra cookies can easily be stored in a cookie tin with a tight fitting lid and used later. The process for making the cakes is long, but fairly easy. I would advice to break up the process into two days, either make the cookies on day one and then make the ganache and assemble cakes on day two or vice versa. I also simplified the chocolate coating by using Ghirardelli dark melting wafers which is so much easier than tempering chocolate and it taste eaqually wonderful. If you cannot find the Ghirardelli wafers in your local store it can be bought online.

Sarah Bernhard Cakes – makes 15 cakes

Ingredients:

For the Macaroons:

150 gram hazelnuts (5.3 ounces)

300 g sugar (10.6 oz)

approx 3 egg whites, at room temperature

For the Ganache:

4 deciliter heavy whipping creme (13.5 fl oz)

250 g dark chocolate, with about 66 % cocoa content (8.8 oz)

For chocolate coating:

300 g Ghirardelli dark melting wafers (10.6 oz)

Directions:

To make hazelnut macaroons: Preheat oven to 340 degrees F (170 degrees C). Line baking sheets with parchment paper and set aside. In a food processor combine hazelnuts and sugar and process until you have a fine crumble. Lightly beat egg whites with a fork to break up whites  a little. With the processor going on low speed, slowly add egg whites until you have a smooth, thick mixture. Drop spoonful’s of hazelnut mixture onto baking sheets, no more than 4-5 cm (1.6 to 2 inches) in diameter, beware that the mixture will spread out. Bake for 13-14 minutes or until they start taking on a golden color. Allow to cool slightly on baking sheet before moving cookies to a cooling rack. Once cooled down, store in a cookie tin until ready to use.

To make ganache: In a small saucepan, heat whipping creme until it just starts to simmer. Remove from heat and let sit covered for 10 minutes. Meanwhile, chop chocolate finely and place into a bowl. Pour whipping creme through a sieve and then back into saucepan, heat to simmer once again and remove from heat. While stirring chopped chocolate in the center, pour creme in a thin stream into chocolate and continue to stir until you have a smooth, shiny chocolate. Refrigerate for at least two hours or overnight.

Assembling cakes: Remove ganache from refrigerator and stir until smooth. Spoon a small amount of ganache onto a macaroon cookie and using a small icing spatula or a butter knife shape the ganache into a rounded cone shape. Set cookie aside and repeat with remaining macaroon cookies until ganache is used up. To cover cakes with melted chocolate, place melted chocolate into a microwave bowl and microwave chocolate in 10 seconds increments, stirring chocolate in-between each heat until chocolate is melted and smooth. Careful not to overheat, as chocolate will then burn and it become nu-usable. Over the bowl of melted chocolate, place a cake onto a fork and spoon melted chocolate over the Sarah Bernhard cake. Once covered, gently tap fork to allow excess to drip off. Place cake onto a piece of foil or parchment paper and allow chocolate to set. Repeat with remaining cakes. If melted chocolate starts to harden, place back into microwave for 10 seconds to soften back up. Once the chocolate has hardened on all cakes, store cookies in a container with a tight fitting lid in the refrigerator. Cakes can be served cold or at room temperature. Enjoy!

Print Friendly and PDF

Read Full Post »

Eton Mess

Eton Mess

Eton Mess gets its unique name from Eton college in England where it is the traditional dessert served at their annual cricket game. To me this dessert is also perfect for a summers evening and if you are having visitors over, it takes no time at all to assemble.

You can make this dessert even easier if you use store-bought meringue cookies, but in case you are unable to find the cookies at your local store, I have included a Meringue recipe here. The recipe calls for superfine sugar, but if you don’t have that on hand you can simply just place regular granulated sugar in a food processor and process for 60 seconds, and voila, you have superfine sugar.

Eton Mess – makes 4-6 servings

Ingredients:

450 gram fresh strawberries (approx 16 oz)

1-2 tablespoons sugar

240 milliliter heavy whipping cream (8 fl oz or 1 cup)

meringue cookies

shaved chocolate, for decoration

Directions:

Rinse strawberries, remove tops and cut into halves or quarters. Sprinkle strawberries with sugar and set aside to macerate for at least 30 minutes.

Beat whipping cream until it starts to thicken, but is still soft. Break meringue cookies into bite size pieces.

Layer strawberries, whipped cream and meringue cookies into your serving glass, finishing off with shaved chocolate. Served immediately and enjoy!

Meringue Cookie (makes 80 cookies)

Ingredients:

3 large egg whites, at room temperature

1/4 teaspoon cream of tarter

150 gram superfine sugar (5.3 oz)

1/4 teaspoon pure vanilla extract

food color, optional

Directions:

Preheat oven to 200 degrees F (93 degrees C). Line baking sheets with parchment paper and set aside.

Place egg whites in a bowl and beat until foamy. Add cream of tarter and beat on medium-high speed until egg whites hold soft peaks. Continue to beat and add sugar, a little at a time, until meringue hold stiff peaks. Beat in vanilla extract and food color (if desired).

Take a small amount of meringue and dap it on the underside corners of the parchment paper, to anchor the paper in place. Load meringue into a pastry bag fitted with a decorative tip of your choice and pipe 1 1/2 inch (about 4 cm) rounds of meringue onto parchment paper. You can pipe the meringue pretty close together since it will not spread out during baking, like a cookie might. Alternatively, you can simply just spoon small mounds of meringue onto parchment paper. Bake meringue in the middle of oven for 1 1/2 to 1 3/4 hours, rotating baking sheets halfway during baking. Turn oven off and let cookies sit with oven door closed for several hours or overnight, to finish drying.

Source: adapted from Joy of Baking

Print Friendly and PDF

Read Full Post »

Brunkager

Brunkager

Last year I was all ready to make my favorite round Brunkager when Joe requested for them to be cut out into anvil shapes for his Blacksmith Christmas party. Now, I had already made up the dough with whole blanched almonds in it, so I had to shift gear for this un-traditional request. I let the dough come to room temperature and I removed the whole almonds from the dough. There were still smaller pieces of almonds mixed in, but that turned out OK for rolling out the dough. So after I made the anvil cookies for him I remembered that I have some cute animal cookie cutters and I decided just to continue on making my Brunkager into cut-out cookies instead of the traditional round. I think they turned out really kinda cute, especially the squirrels.

Brunkager cut-outs

Brunkager cut-outs

Note: In the traditional round Brunkager there are blanched almonds in the dough. If you want, you can still leave add almonds but they need to be finely chopped in order for you to roll the dough out. And I wouldn’t add too many, start with 40-50 grams and see what you think.

Anvil Brunkager

Anvil Brunkager

Brunkager

Ingredients:

200 grams butter (7 ounces), at room temperature

200 grams sugar (7 ounces)

1 deciliter syrup (0.4 cup) (100 milliliter)

1 teaspoon ground ginger

3 teaspoons ground cinnamon

2 teaspoons ground cloves

325 – 350 grams flour (11.4 – 12.3 ounces)

1 teaspoon baking soda

a pinch of salt

50 grams blanched almonds, finely chopped (1.7 ounces), Optional

For the icing:

1 cup powdered sugar (110 grams)

1 tablespoon meringue powder

about 1/4 cup warm water (60 ml)

Directions:

In the bowl of an stand-up mixer fitted with the paddle attachment or electrical mixer add butter and sugar and beat until smooth. Add syrup, ginger, cinnamon and cloves, mix until combined. Holding back a small amount of flour for kneading the dough, add the majority of the flour and all of the baking soda, salt and almonds (optional). Mix until combined, careful not to over-mix. Turn dough out onto working surface and using the remaining flour, knead the dough briefly until smooth.  Divide dough into two equal portions and wrap in plastic wrap. Place dough in a zip-lock bag and let dough rest in refrigerator overnight.

Remove dough from refrigerator and let dough rest on your counter for 30-40 minutes. Preheat oven to 176 degrees C (350 degrees F) and line baking sheets with parchment paper. On a lightly floured work surface roll out dough to approximately 4-5 mm (0.2 inch) thickness. Using your favorite cookie cutters, press out the cookies and using a small spatula gently lift dough onto cookie sheet. Bake in the middle of oven for 9-12 minutes. Cool on baking sheet for 2-3 minutes before moving to cooling rack. Once cookies are completely cooled, decorate with icing if desired.

To make Icing: Note – for these particular cookies I only iced along the edges of cookies. If you plan on filling in cookies with icing, I would recommend doubling the icing recipe.

In a medium bowl sift together powdered sugar and meringue powder. Add warm water in increments, while mixing with your electrical mixer. Beat on medium speed until smooth and glossy. Proper consistency is when a ribbon of icing falls into bowl and remain on surface for a few seconds. Add more confectioners sugar if icing becomes too thin. Use icing immediately or store in an airtight container covered with plastic wrap directly on the surface.

Be sure icing in completely set before storing cookies in an airtight container. It could take several hours for icing to set. Merry Christmas

Source: My Danish Kitchen

Print Friendly and PDF

Read Full Post »

Chocolate Almond Biscotti

Chocolate Almond Biscotti

Making Biscotti has been on my to-do-list for years now. I love Biscotti and buy them often at the store, but knowing now how delicious and easy they are to make, I’m gonna have to try making them again real soon. This particular Biscotti is meant to be softer than your standard Biscotti and it is a little piece of chocolate heaven. I love the fact that it is softer and I must confess, I had two in one setting.

Making Chocolate Almond Biscotti

Making Chocolate Almond Biscotti

Chocolate-Almond Biscotti (makes 15 Biscotti)

Ingredients:

2 cups all-purpose flour (270 grams)

1/2 cup unsweetened cocoa (45 grams)

1 teaspoon baking soda

1/4 teaspoon salt

6 tablespoons unsalted butter, room temperature (85 grams)

1 cup sugar (215 grams)

2 large eggs, room temperature

1/2 cup blanched, chopped almonds (70 grams)

1/2 cup chocolate chips (85 grams)

Directions:

Preheat oven to 350 degrees F (177 degrees C). Line baking sheet with parchment paper and set aside.

In a medium bowl combine flour, cocoa powder, baking soda and salt, stir and set aside. In the bowl of an electrical mixer, cream butter and sugar until light and smooth, 3-5 minutes. Add eggs one at the time, mixing well in-between and scraping down sides as needed. Add flour in three increments, mixing to combine, dough will be firm. Stir in almonds and chocolate chips.

Place dough on baking sheet and shape into an approximately 12 x 4 inch flat log (30 x 10 cm). Bake for 30 minutes. Remove from oven and cool for 5 minutes.

Lower oven temperature to 300 degrees F (150 degrees C). Place Biscotti log onto a cutting board and with a sharp serrated knife, cut into 3/4 inch slices (2 cm). Place slices back onto baking sheet, cut side down, and bake for 8 minutes. Remove from oven and allow to cool. Enjoy with a cup of tea or coffee.

Source: adapted from Martha Stewart

Print Friendly and PDF

Read Full Post »

Vaniljekranse a la Blomsterberg

Vaniljekranse a la Blomsterberg

This year I wanted to try a different Vaniljekranse recipe for Christmas, although my Mom’s recipe still remains my favorite. When I saw Mette Blomsterberg’s recipe I wanted to try it because, #1 she is a very talented Danish pastry chef and #2 this recipe says you can use a pastry bag with a star shaped decorating tip to press out the cookies. This is of particular interest for those of you who don’t have the traditional star attachment for a KitchenAid machine (which I know is a great fustration to many Danes living outside Denmark). And so I tried it out and it is possible to press the cookies out using a pastry bag fitted with a star tip, however, I didn’t have the muscle to continue on with it. So unless you have a very strong and preferably handsome mountain man handy to help you out, I think you might have a hard time.

Making Vaniljekranse using a pastry bag with a star decorating tip.

Making Vaniljekranse using a pastry bag with a star decorating tip.

Lets talk a little bit about butter. This year I was lucky enough to find real Danish Lurpak butter at a local high-end grocery store. It is expensive, but the result is a wonderful, very creamy buttery taste to your cookies. Is it worth the extra cost? To most people, probably not, but it sure is a fantastic creamy butter. Also, I want to point out that when you bake in Denmark it is a given that you use salted butter, whereas in the US you typically bake with unsalted butter, unless otherwise stated, and then a little salt is built into the recipe on the side. Just worth noting (it actually took me 28 years to realize this, ha).

Creamy Danish Lurpak butter

Creamy Danish Lurpak butter

Vaniljekranse (makes about 35 cookies)

Ingredients:

1 whole vanilla bean

180 grams sugar

200 grams salted butter, room temperature

1 egg, room temperature

75 grams almond meal/flour

250 grams all-purpose flour

Directions:

Scrape the seeds from the vanilla bean and press the seeds into a tablespoon of the sugar. Beat butter, sugar and vanilla seeds until smooth and creamy (4-5 minutes). Add the egg and continue mixing until fully incorporated. In small increments, add almond meal and flour, mix until dough comes together.

If you plan on using a piping bag with a star tip to press out dough and form into circles, roll up your sleeves and use dough immediately.

If you plan on using a star attachment for you KitchenAid mixer, wrap dough in plastic wrap and place in refrigeator for at least 1 hour.

Preheat oven to 390 degrees F (200 degrees C). Line baking sheets with parchment paper. Cut dough into small segments and load the dough into the meat grinder attachment on your KitchenAid machine. Run the dough through the star attachment into long strips, place dough onto baking sheet and cut dough into 4 inch long pieces and form into circle. Bake in the middle of oven for 10-14 minutes or until just turning golden. Cool on baking sheets for a couple of minutes before moving them to a cooling rack. Once cookies are completely cooled, store in an airtight cookie tin.

Merry Christmas and Enjoy.

Star attachment on KitchenAid meat grinder.

Star attachment on KitchenAid meat grinder.

Source: adapted from Mette Blomsterberg

Print Friendly and PDF

Read Full Post »

Chokolade Specier

Chokolade Specier

Chokolader Specier is a traditional Danish Butter Cookie loaded with chopped chocolate. Danish butter cookies have been around since 1933 and I am sure you are familar with the dark blue tins of Royal Dansk Butter cookies being sold in many stores today. Usually I am not a big fan of butter cookies, but add lots of chocolate and you can count me in. These chocolate butter cookies are not overly sweet and the crumb is soft and flaky. I guess, if you stretch your imagination, you could think of these Chokolade Specier as the Danish version of the American Chocolate Chip cookie.

Scrape seeds from Vanilla bean and press into a teaspoon sugar, this will separate the seeds.

Scrape seeds from Vanilla bean and press into 1 teaspoon sugar, this will separate the seeds. Add chocolate and mix to combine. Press dough into logs, chill. Slice and bake.

Chokolade Specier – Chocolate Butter Cookie (makes 60-70 cookies)

Ingredients:

300 gram butter (salted) , at room temperature (10.5 ounces)

125 gram confectioners sugar (4.4 ounces)

375 gram all-purpose flour (13.2 ounces)

seeds from 1 vanilla bean

1 teaspoon sugar

200 gram semi-sweet chocolate, chopped (7 ounces)

Directions:

Cut open the vanilla bean and scrape the seeds out. Press the seeds into 1 teaspoon sugar with the flat side of a knife, this is to separate the seeds, set aside.

Using your hands or a mixer, combine butter, confectioners sugar, vanilla bean seeds and flour. When the dough starts to come together add chocolate and mix until combined. Pour dough onto work surface, press the dough together with your hands and then roll into logs 4 centimeter (1.5 inch) wide. Try to work quickly so the warmth from your hands doesn’t alter the chocolate. Wrap logs tightly in plastic wrap and store in refrigerator for at least 4 hours before baking.

When ready to bake cookies, preheat oven to 200 degrees Celsius (390 degrees Fahrenheit). Line baking sheets with parchment paper and set aside. Slice dough into 5-10 millimeter (0.2-0.4 inch) thickness and bake for 8 minutes. Allow to cool completely before storing in an airtight cookie tin. Glædelig Jul and Merry Christmas!

Source: adapted from Kager til Kaffen

Print Friendly and PDF

Read Full Post »

Bordstabler

Ok, I know it’s not Christmas yet, it is not even December, however, I just get so excited about this time of year 🎅 Anyway, this cookie doesn’t have to be a Christmas cookie, it could be like a little side dessert for any occasion.

Bordstabler are wonderful Norwegian Christmas cookies. They are tender butter cookies with a strip of delicious almond meringue on top. I served these cookies for the Blacksmith gang and the cookies were all gone except for 3 by the end of the meeting.

The dough itself gave me a bit of trouble though. After all ingredients were added it still appeared very soft and tacky but I figured it would set up some in the fridge, which it did, but not enough. So I had to knead the dough while adding more flour until it was smooth and no longer sticky. That being said I have written the recipe up the way I followed it, but you need to know that you’ll probably have to add a little more flour than the recipe calls for and I would add it in as needed while kneading the dough. Even though the dough was temperamental the cookies were well worth the effort. I hope you enjoy these Bordstabler as much as the Blacksmith gang did 🙂

Bordstabler (makes about 25 cookies)

Ingredients:

1 egg yolk

1/2 tablespoon heavy whipping cream

60 g sugar (2.1 oz)

125 g butter, at room temperature (4.4 oz)

125 g flour (4.4 oz), plus more while kneading dough

Filling:

2 egg whites, at room temperature

120 g confectioners’ sugar, sifted (4.2 oz)

120 g almond meal/flour(4.2 oz)

Directions:

Using a hand-held mixer beat together the egg yolk, whipping cream and sugar. While continuing to mix add butter and flour in 1/3 increments until all incorporated. Place dough on a well-floured surface; knead dough adding more flour as needed until dough is no longer sticky. Wrap dough in plastic wrap and refrigerate for a minimum of 1 hour.

Before you take the dough out of the refrigerator, make the filling.

To make the filling: whip the egg whites until stiff. Sift the confectioners’ sugar over the egg whites and add almond meal, fold into egg whites. Place filling into a pastry bag fitted with a tip of your choice (I used# 21) and set aside. If you don’t have a pastry bag and tip, simply just spoon the filling onto dough.

Preheat oven to 345 degrees F (175 degrees C). Line two large baking sheets with parchment paper.

Sprinkle your work surface with flour and roll the dough out to 2 mm thickness. Using a pastry cutter, cut out the cookies to a 2 x 10 cm rectangle (0.8 x 4 in). Gently lift up dough rectangle and place on baking sheet. Using your pastry bag squeeze a long strip of filling onto each dough rectangle.

Bake for 10 minutes or until golden. Allow to cool on baking sheet for a few minutes before moving cookies to a cooling rack.

Source: adapted from dinmat.no

Print Friendly and PDF

Read Full Post »

Honninghjerte

Honninghjerte

Honninghjerter has a special place in my heart. I remember as a child always starring at the hearts in the store and it was a special occation when I was allowed to get one. The hearts are sold only at Christmas time and they are decorated with a glansbillede which were very popular in Denmark when I was growing up. All the girls in my class would collect glansbilleder and we would trade them with each other, so making these Honey Hearts brought back a lot of wonderful memories.

Making Pre-dough, melt honey and mix with flour, store dough for 1 month.
To break up Pre-dough, carefully chip dough into small pieces using the tip of your knife.

Honninghjerter is typically not a Christmas cookie or cake that you bake at home for Christmas, perhaps because it is a rather lengthy process to make them. It is only in the past few years that they have become popular to make and I have seen them on different Danish food blogs. What I found was a lack of description and direction on the details on how to make them. For example, what is the best way to break up the very hard Pre-dough and there were no descriptions anywhere of how big the hearts should be, when cut out. So this has really been a trail and error ordeal, but the hearts turned out wonderful and they tasted just like I remember them, like Christmas 😀

Mixing dough can be a rough ride, chop Pre-dough into small pieces to make mixing easier. Image #2 is dough after 3 minutes of mixing, image #3 is dough after 6 minutes of mixing. Dough will be very sticky.

Mixing dough can be a rough ride, chop Pre-dough into small pieces to make mixing easier. Image #2 is dough after 3 minutes of mixing, image #3 is dough after 6 minutes of mixing. Dough will be very sticky.

Making Honninghjerter is a very long process. If you want them ready for Christmas, you should make the Pre-dough around mid November. The Pre-dough should rest for 1 month but you can probably get away with less, if you get a late start. The Pre-dough will get very hard after a month of resting, and this is normal. I found the best way to break up the hard dough is by carefully inserting the tip of a sharp knife and twist the knife to break loose the dough. The smaller the pieces, the easier it will be to mix everything up later, so feel free to give the dough a quick chop after it’s broken up.

Dough will be very sticky, use plenty of flour for rolling.

Using a cookie cutter will save you time. My pre-baked hearts were 11 cm wide (4.3 inches) which were a little too big. Note: dough will spread out quite a bit during baking. When rolling the dough it will be very sticky, use plenty of flour for rolling.

As for the size of the hearts I didn’t know what size cookie cutter to buy, so I simply just cut a template out of paper and cut them out with a knife (which turned out to be very time consuming). My pre-baked hearts measured 11 cm wide (4.3 inch) but grew quite a bit during baking to 15 cm wide (5.9 inch). The hearts are suppose to be big but I thinks mine turned out jumbo 🙂 so I would recommend scaling them down a bit.

After baking the heart will be a little hard. They now need to rest with a moist towel in the refrigerator for 3-4 days. This is how I did it without the towel resting directly on the hearts.

After baking, the heart will be a little hard. They now need to rest with a moist towel in the refrigerator for 3-4 days. This is how I did it without the towel resting directly on the hearts.

Honninghjerter – Honey Hearts (makes 13 large)

Ingredients:

Pre-dough: (made 1 month ahead)

500 gram honey

500 gram all-purpose flour

Directions for Pre-dough:

Pour honey in a small cooking pot and heat to 40-50 degrees Celsius (104-122 degrees Fahrenheit). Combine warm honey and flour until a smooth mass, place into a container and seal with lid. Store container in a cool, dry place for a minimum of 1 month. The honey pre-dough will get very hard, which is alright. It will soften up again later in the recipe.

Honninghjerter dough:

2 egg yolks

10 gram hjortetaksalt

10 gram potaske

1 tablespoon water

Pre-dough, chopped into small pieces

5 gram ground cinnamon (approx 1 small tablespoon)

5 gram ground ginger (approx 1 small tablespoon)

5 gram ground cloves (approx 1 small tablespoon)

200 gram dark chocolate (for decorating)

Directions for Honninghjerter:

The Pre-dough will now be very hard. Take a sharp knife and carefully start chipping away at the hard dough. Put tip of knife into dough and give a twist to break up the dough little by little. Smaller pieces of honey dough will make your work easier later on, so if you have big chunks, chop them smaller.

Mix egg yolks with hjortetaksalt, set aside. Stir potaske into water until completely dissolved, set aside. Place pre-dough pieces into the bowl of a stand-mixer (the mixing can also be done by hand but will require a lot of muscle). Add egg mixture and potaske mixture to dough. Add cinnamon, ginger and ground cloves. Start mixer on low for 3 minutes, it will be a rough ride. Increase speed to high and mix for another 3 minutes, dough will now become smooth and very sticky.

Preheat oven to 180 degrees Celsius (350 degrees Fahrenheit). Line baking sheets with parchment paper and sprinkle paper lightly with flour, set aside.

Sprinkle a very generous layer of flour onto your work surface and scrap dough out onto floured surface (using a wooden spoon works really well for scraping out the sticky dough). Sprinkle more flour on top of dough and give a quick knead. Roll dough out to 4 mm thickness (0.15 inch), sprinkle more flour as needed. Press or cut out heart shapes, using a spatula, place hearts onto baking sheets leaving 5 cm  (2 inches) distance between hearts. Repeat rolling of scrap dough and cutting out hearts until dough is used up. Bake hearts for 8-10 minutes. Test for doneness by gently pressing a finger into center of heart, when done it should spring back and not leave a finger imprint.

Storing hearts: Allow hearts to cool completely. Using a pastry brush, remove excess flour from bottom of each heart. At this point the hearts will be quite hard and they now need to soften up for a couple of days in the refrigerator. Place hearts in a container with a moist clean towel. I did this by lining a box with plastic, place hearts inside box, then one of my cooling racks and then the moist towel. The rack just prevents the moist towel from resting directly on the hearts. Seal container and store in refrigerator for 3-4 days. After the four days, continue to store hearts in refrigerator in a regular contain, but without the moist towel. Hearts can last for over a month in refrigerator. Note: remove only the hearts that you need, brush with melted chocolate and enjoy the same day. Glædelig Jul and Merry Christmas.

Honninghjerte

Honninghjerte

Source: Claus Meyer

Print Friendly and PDF

Read Full Post »

Hindbærsnitter

Hindbærsnitter

Hindbærsnitter remains one of my all-time favorite Danish pastries and while we were vacationing home in Denmark this summer, I had my fair share of them from the bakery (that, and Træstammer). So after coming home I was looking for an excuse to bake them again and finally got the opportunity when a friend of ours came for a short stay, thanks Vince 🙂

This recipe is not that different from my other post about Hindbærsnitter, it probably differs mostly in technique. The result was a very, very tasty Hindbærsnit, although the cake turned out very delicate and frail. I think that was due to the fact that I interpreted the directions to roll out the dough to a 25 by 30 cm rectangle. Looking back, I think what Lone Landmand (from Beretninger fra et autentisk landbrug) meant was to roll the dough out to a 25 or 30 cm square. I believe that if you roll it out to a 25 by 25 cm square you will get a slightly thicker, and therefor a less delicate outcome. If you decide to try this recipe for Hindbærsnitter, I know you’ll love them.

Making Hindbærsnitter

Making Hindbærsnitter

Hindbærsnitter (makes 12-16 pieces)

Ingredients:

300 gram all-purpose flour (10.5 oz)

100 gram confectioners sugar (3.5 oz)

200 gram butter, at room temperature (7 oz)

2 large egg yolks

280 gram seedless raspberry jam (10 oz)

For the glaze:

270 gram confectioners sugar (approx 2 1/2 cups)

3-4 tablespoons cold water

Colored sprinkles for decorating

Directions:

In a mixer fitted with the paddle attachment, combine flour, confectioner sugar and cut-up butter. On low speed, combine until mixture is crumbly. Add egg yolks one at the time, gradually increasing speed to medium, mix until dough comes together. Divide dough into two equal portions, place each half of dough on a piece of parchment paper and slightly press dough into a square shape. Place both pieces of dough in refrigerator for 1 hour to rest and chill.

Preheat oven to 175 degrees C (345 degrees F)

Keeping the dough on parchment paper, roll dough out to approximately 25 x 25 cm (9.5 x 9.5 inches), repeat with the second piece of dough. Place each parchment paper with rolled out dough onto a baking sheet. Bake dough, one sheet at the time, for 12 minutes or until edges turn golden. Allow baked cake to cool a little. Meanwhile, make the glaze by mixing confectioners sugar and water until smooth. Prepare raspberry jam by stirring it to make a loose flowing jam. Spread jam onto the first baked cake, this will be the bottom piece. Gently slide a flexible plastic cutting board under the second cake and lift it up. Then slide it off the cutting board onto the first raspberry covered cake. If the cake crack a little don’t worry, the glaze will cover it up. Spread the glaze over the top and add sprinkles before the glaze sets. Allow glaze to set completely before cutting. Enjoy!

Source: Beretninger fra et autentisk landbrug

Print Friendly and PDF

Read Full Post »

Cranberry-Walnut Chocolate Chip Cookies

Cranberry-Walnut Chocolate Chip Cookies

I have been on the hunt for a go-to-cookie for a long time now. One that fits anytime of the year, one that is quick and easy to make and I think I have finally found one. I have made these both with and without the walnuts, not everybody like nuts you know, and they are equally good with and without. They tend to spread out a little more without the nuts, but that’s OK. These cookies have a wonderful background flavor of brown sugar, which reminds me of a Blondie, and the combination of walnuts and cranberries gives them a slight crunch and makes them nice and soft, all at the same time. These cookies are definitely a keeper and I think you’ll really enjoy them as well.

IMG_4909

Roll dough into 1 1/2 inch balls

Ingredients:

2 3/4 cup all-purpose flour (360 grams)

1 teaspoon baking soda

1/2 teaspoon baking powder

3/4 teaspoon salt

1 cup butter, room temperature (226 grams)

3/4 cup sugar (155 grams)

1 cup packed brown sugar (185 grams)

2 large eggs, room temperature

2 teaspoons pure vanilla extract

10 oz. semi-sweet chocolate chips (280 grams)

1 1/2 cup dried cranberries (140 grams)

1 cup chopped walnuts (112 grams)

Directions:

Line baking sheets with parchment paper and set aside. Preheat oven to 350 degrees Fahrenheit (175 degrees Celsius).

Sift together flour, baking soda, baking powder and salt, set aside. Cream butter and sugars until smooth and soft, about 2-3 minutes. Add eggs one at a time and beat until smooth. Add vanilla and mix until fully incorporated, scrape down sides of bowl as needed. With mixer on low, add flour in three increments and mix only until fully incorporated. Add chocolate chips, cranberries and chopped walnuts, mix only until incorporated. Working quickly, roll dough into 1 1/2 inch balls (approx. 4 cm), place on prepared baking sheet 2 inches apart (5 cm). If dough feels very soft when rolling, place baking sheet with dough balls in refrigerator for 5 minutes before baking. Bake for 16-20 minutes or until done. Cool and baking sheet for 2 minutes before transferring to cooling rack. Enjoy!

Freshly baked Cranberry-Walnut Chocolate Chip Cookies

Freshly baked Cranberry-Walnut Chocolate Chip Cookies

Source: adapted from Bakerella

Print Friendly and PDF

Read Full Post »

Older Posts »

%d bloggers like this: