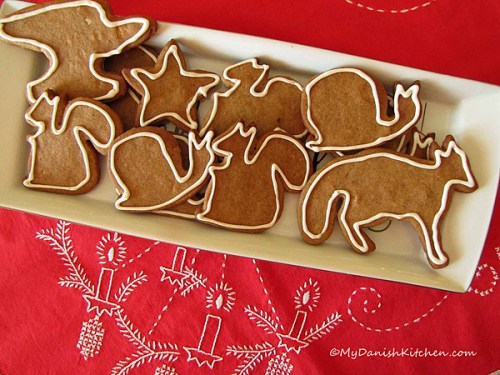
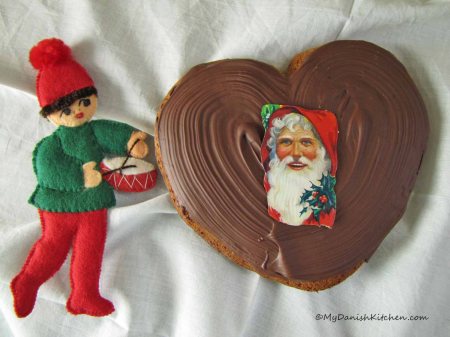
Feeds:
Posts
Comments

Posts Tagged ‘christmas’

Making Æbleskiver pour batter, rotate 1/4 turn, backfill with more batter, rotate last 1/4 turn and finish frying until baked through.

It’s that time of year again and although it’s a little early, I just had to make some delicious danish Æbleskiver. They are wonderful served warm with a little jam and perhaps some warm red or white Gløgg (mulled wine). By the way, they can also be made ahead of time, tossed in the freezer and quickly reheated in the oven. Here’s a slightly different recipe with egg whites which makes them a little lighter. Also the technique is different than my previous Æbleskive post, in that I backfill each Æbleskive with a little more dough which helps get a rounder Æbleskive. If you want to see the previous post or want to read more about the traditions surrounding Æbleskiver click the above link. I hope you enjoy these super delicious Æbleskiver.

Æbleskiver (makes 40-45)

Ingredients:

500 g all-purpose flour (17.6 oz)

2 tsp salt

2 tsp baking soda

3 tsp vanilla sugar

3 tbsp sugar

4 egg yolks

8 dl buttermilk (27 fluid oz)

zest from 1 lemon

4 egg whites

Canola oil for frying

Directions:

Combine flour, salt, baking soda, vanilla sugar and sugar, set aside. Stir egg yolks and buttermilk together and beat into dry ingredients. Zest lemon into batter and beat to combine. In a separate bowl, beat egg whites stiff and fold into batter.

Preheat æbleskive pan to medium high. Brush pan with canola oil and pour batter. Using a knitting needle (sound odd, but works really well) or a skewer, turn æbleskiver 1/4 turn and fry a little more. Backfill each with a little more batter and turn the last 1/4 turn. Finish frying, turning æbleskiver until baked through. Serve warm with jam and/or sugar, smiles and a heavy dose of hygge. Enjoy!

Source: My Danish Kitchen

Print Friendly and PDF

Read Full Post »

White Gløgg

Hvid Gløgg

It is the time of year, my most favorite, when you cozy up with a warm glass of Gløgg and munch on some delicious Danish Æbleskiver. Gløgg made with red wine is traditional in Denmark and taste wonderful but this Gløgg made with white wine and elderflower concentrate is fantastic. So if you can get your hands on some elderflower concentrate, which is sold by IKEA and a couple of online stores, you simply must try this white wine Gløgg. I used 100 grams of sugar in the recipe but it can probably be cut back to 50 grams, taste as you go along and see how much sugar you like. Enjoy and Merry Christmas to everyone.

Hvid Gløgg

Ingredients:

1 bottle white wine (Chardonnay)

2 deciliter rum(Bacardi) (200 ml or 6.7 fl oz)

2 deciliter Elderflower concentrate (200 ml or 6.7 fl oz)

4 whole cinnamon sticks

8 cardamon pods

50-100 gram sugar (1.8-3.5 oz)

1 organic lemon, sliced

Directions:

Combine all ingredients into a saucepan and warm over low heat. Do not boil or simmer. Serve warm and Enjoy!

Hvid Gløgg

Hvid Gløgg

Source: adapted from politiken.dk

Print Friendly and PDF

Read Full Post »

Brunkager

Brunkager

Last year I was all ready to make my favorite round Brunkager when Joe requested for them to be cut out into anvil shapes for his Blacksmith Christmas party. Now, I had already made up the dough with whole blanched almonds in it, so I had to shift gear for this un-traditional request. I let the dough come to room temperature and I removed the whole almonds from the dough. There were still smaller pieces of almonds mixed in, but that turned out OK for rolling out the dough. So after I made the anvil cookies for him I remembered that I have some cute animal cookie cutters and I decided just to continue on making my Brunkager into cut-out cookies instead of the traditional round. I think they turned out really kinda cute, especially the squirrels.

Brunkager cut-outs

Brunkager cut-outs

Note: In the traditional round Brunkager there are blanched almonds in the dough. If you want, you can still leave add almonds but they need to be finely chopped in order for you to roll the dough out. And I wouldn’t add too many, start with 40-50 grams and see what you think.

Anvil Brunkager

Anvil Brunkager

Brunkager

Ingredients:

200 grams butter (7 ounces), at room temperature

200 grams sugar (7 ounces)

1 deciliter syrup (0.4 cup) (100 milliliter)

1 teaspoon ground ginger

3 teaspoons ground cinnamon

2 teaspoons ground cloves

325 – 350 grams flour (11.4 – 12.3 ounces)

1 teaspoon baking soda

a pinch of salt

50 grams blanched almonds, finely chopped (1.7 ounces), Optional

For the icing:

1 cup powdered sugar (110 grams)

1 tablespoon meringue powder

about 1/4 cup warm water (60 ml)

Directions:

In the bowl of an stand-up mixer fitted with the paddle attachment or electrical mixer add butter and sugar and beat until smooth. Add syrup, ginger, cinnamon and cloves, mix until combined. Holding back a small amount of flour for kneading the dough, add the majority of the flour and all of the baking soda, salt and almonds (optional). Mix until combined, careful not to over-mix. Turn dough out onto working surface and using the remaining flour, knead the dough briefly until smooth.  Divide dough into two equal portions and wrap in plastic wrap. Place dough in a zip-lock bag and let dough rest in refrigerator overnight.

Remove dough from refrigerator and let dough rest on your counter for 30-40 minutes. Preheat oven to 176 degrees C (350 degrees F) and line baking sheets with parchment paper. On a lightly floured work surface roll out dough to approximately 4-5 mm (0.2 inch) thickness. Using your favorite cookie cutters, press out the cookies and using a small spatula gently lift dough onto cookie sheet. Bake in the middle of oven for 9-12 minutes. Cool on baking sheet for 2-3 minutes before moving to cooling rack. Once cookies are completely cooled, decorate with icing if desired.

To make Icing: Note – for these particular cookies I only iced along the edges of cookies. If you plan on filling in cookies with icing, I would recommend doubling the icing recipe.

In a medium bowl sift together powdered sugar and meringue powder. Add warm water in increments, while mixing with your electrical mixer. Beat on medium speed until smooth and glossy. Proper consistency is when a ribbon of icing falls into bowl and remain on surface for a few seconds. Add more confectioners sugar if icing becomes too thin. Use icing immediately or store in an airtight container covered with plastic wrap directly on the surface.

Be sure icing in completely set before storing cookies in an airtight container. It could take several hours for icing to set. Merry Christmas

Source: My Danish Kitchen

Print Friendly and PDF

Read Full Post »

Varm Chokolade Med Amaretto

Varm Chokolade Med Amaretto

When the weather turns cold there is nothing like a nice cup of hot chocolate to keep you warm. These days I like mine with a shot of Amaretto, just to warm my bones a little more. Adding Amaretto is of course completely optional, but chocolate and Amaretto is a pair made in heaven.

Homemade hot chocolate is not overly sweet, as the store-bought kind, and I love a dollop of whipped cream on top for extra creaminess. Or if you are serving it for children, marshmallows would be a lot more fun. 🙂 Stay warm out there.

Hot Chocolate With Amaretto (Makes 2 large servings)

Ingredients:

5 deciliter (or 16.9 fluid oz) milk

75 gram (or 2.6 oz) dark chocolate 60 %

2 shots Amaretto

whipping cream, optional, for topping

Directions:

If you want a dollop of whipped cream on top of your hot chocolate, whip then cream and set aside.

Chop chocolate finely. Heat milk to 85 degrees C (185 degrees F) which is hot, but not simmering. Remove from heat and add chopped chocolate. Stir until chocolate is dissolved. Add Amaretto and stir. Pour into serving glass and top with a dollop of whipped cream if desired, serve immediately or store hot chocolate in a thermos for later. Enjoy

Hot Chocolate With Amaretto

Hot Chocolate With Amaretto

Source: My Danish Kitchen

Print Friendly and PDF

Read Full Post »

Vaniljekranse a la Blomsterberg

Vaniljekranse a la Blomsterberg

This year I wanted to try a different Vaniljekranse recipe for Christmas, although my Mom’s recipe still remains my favorite. When I saw Mette Blomsterberg’s recipe I wanted to try it because, #1 she is a very talented Danish pastry chef and #2 this recipe says you can use a pastry bag with a star shaped decorating tip to press out the cookies. This is of particular interest for those of you who don’t have the traditional star attachment for a KitchenAid machine (which I know is a great fustration to many Danes living outside Denmark). And so I tried it out and it is possible to press the cookies out using a pastry bag fitted with a star tip, however, I didn’t have the muscle to continue on with it. So unless you have a very strong and preferably handsome mountain man handy to help you out, I think you might have a hard time.

Making Vaniljekranse using a pastry bag with a star decorating tip.

Making Vaniljekranse using a pastry bag with a star decorating tip.

Lets talk a little bit about butter. This year I was lucky enough to find real Danish Lurpak butter at a local high-end grocery store. It is expensive, but the result is a wonderful, very creamy buttery taste to your cookies. Is it worth the extra cost? To most people, probably not, but it sure is a fantastic creamy butter. Also, I want to point out that when you bake in Denmark it is a given that you use salted butter, whereas in the US you typically bake with unsalted butter, unless otherwise stated, and then a little salt is built into the recipe on the side. Just worth noting (it actually took me 28 years to realize this, ha).

Creamy Danish Lurpak butter

Creamy Danish Lurpak butter

Vaniljekranse (makes about 35 cookies)

Ingredients:

1 whole vanilla bean

180 grams sugar

200 grams salted butter, room temperature

1 egg, room temperature

75 grams almond meal/flour

250 grams all-purpose flour

Directions:

Scrape the seeds from the vanilla bean and press the seeds into a tablespoon of the sugar. Beat butter, sugar and vanilla seeds until smooth and creamy (4-5 minutes). Add the egg and continue mixing until fully incorporated. In small increments, add almond meal and flour, mix until dough comes together.

If you plan on using a piping bag with a star tip to press out dough and form into circles, roll up your sleeves and use dough immediately.

If you plan on using a star attachment for you KitchenAid mixer, wrap dough in plastic wrap and place in refrigeator for at least 1 hour.

Preheat oven to 390 degrees F (200 degrees C). Line baking sheets with parchment paper. Cut dough into small segments and load the dough into the meat grinder attachment on your KitchenAid machine. Run the dough through the star attachment into long strips, place dough onto baking sheet and cut dough into 4 inch long pieces and form into circle. Bake in the middle of oven for 10-14 minutes or until just turning golden. Cool on baking sheets for a couple of minutes before moving them to a cooling rack. Once cookies are completely cooled, store in an airtight cookie tin.

Merry Christmas and Enjoy.

Star attachment on KitchenAid meat grinder.

Star attachment on KitchenAid meat grinder.

Source: adapted from Mette Blomsterberg

Print Friendly and PDF

Read Full Post »

Marzipan with Nougat balls

Marzipan with Nougat balls

Making confections is one of many Christmas activities that is popular in Denmark and it’s especially fun to make with your children, not to mention delicious to eat. To make the chocolate dipping less cumbersome I used a plastic fork and broke off the middle two digits to allow the chocolate to drip off more easily. I made half a batch with rainbow sprinkles and half without. The sprinkles add a crunch and a fun splash of color but you can use any kind of covering you like, for example, finely chopped nuts, freeze dried raspberries or coconut, just let your imagination run wild. Have fun making these.

Making Christmas confection

Making Christmas confection

Marzipan with Nougat Confections (makes 16 pieces)

Ingredients:

100 gram Marzipan (3.5 oz.)

50 gram Nougat (1.75 oz.)

200 gram chocolate (7 oz.) melted, milk or dark your choice

50 gram Rainbow Nonpareils (1.75 oz.) optional

Directions:

Melt chocolate over a water bath. Cut off small pieces of marzipan and flatten to a disc with your fingers. Place a small amount of nougat in the center of marzipan and close the marzipan around nougat to form a ball. Dip the ball into the melted chocolate, drip off excess and toss the chocolate covered ball in the rainbow sprinkles. Place on a baking sheet to cool and harden. Store in airtight tin. Enjoy!

Source: My Danish Kitchen

Print Friendly and PDF

Read Full Post »

Chokolade Specier

Chokolade Specier

Chokolader Specier is a traditional Danish Butter Cookie loaded with chopped chocolate. Danish butter cookies have been around since 1933 and I am sure you are familar with the dark blue tins of Royal Dansk Butter cookies being sold in many stores today. Usually I am not a big fan of butter cookies, but add lots of chocolate and you can count me in. These chocolate butter cookies are not overly sweet and the crumb is soft and flaky. I guess, if you stretch your imagination, you could think of these Chokolade Specier as the Danish version of the American Chocolate Chip cookie.

Scrape seeds from Vanilla bean and press into a teaspoon sugar, this will separate the seeds.

Scrape seeds from Vanilla bean and press into 1 teaspoon sugar, this will separate the seeds. Add chocolate and mix to combine. Press dough into logs, chill. Slice and bake.

Chokolade Specier – Chocolate Butter Cookie (makes 60-70 cookies)

Ingredients:

300 gram butter (salted) , at room temperature (10.5 ounces)

125 gram confectioners sugar (4.4 ounces)

375 gram all-purpose flour (13.2 ounces)

seeds from 1 vanilla bean

1 teaspoon sugar

200 gram semi-sweet chocolate, chopped (7 ounces)

Directions:

Cut open the vanilla bean and scrape the seeds out. Press the seeds into 1 teaspoon sugar with the flat side of a knife, this is to separate the seeds, set aside.

Using your hands or a mixer, combine butter, confectioners sugar, vanilla bean seeds and flour. When the dough starts to come together add chocolate and mix until combined. Pour dough onto work surface, press the dough together with your hands and then roll into logs 4 centimeter (1.5 inch) wide. Try to work quickly so the warmth from your hands doesn’t alter the chocolate. Wrap logs tightly in plastic wrap and store in refrigerator for at least 4 hours before baking.

When ready to bake cookies, preheat oven to 200 degrees Celsius (390 degrees Fahrenheit). Line baking sheets with parchment paper and set aside. Slice dough into 5-10 millimeter (0.2-0.4 inch) thickness and bake for 8 minutes. Allow to cool completely before storing in an airtight cookie tin. Glædelig Jul and Merry Christmas!

Source: adapted from Kager til Kaffen

Print Friendly and PDF

Read Full Post »

Honninghjerte

Honninghjerte

Honninghjerter has a special place in my heart. I remember as a child always starring at the hearts in the store and it was a special occation when I was allowed to get one. The hearts are sold only at Christmas time and they are decorated with a glansbillede which were very popular in Denmark when I was growing up. All the girls in my class would collect glansbilleder and we would trade them with each other, so making these Honey Hearts brought back a lot of wonderful memories.

Making Pre-dough, melt honey and mix with flour, store dough for 1 month.
To break up Pre-dough, carefully chip dough into small pieces using the tip of your knife.

Honninghjerter is typically not a Christmas cookie or cake that you bake at home for Christmas, perhaps because it is a rather lengthy process to make them. It is only in the past few years that they have become popular to make and I have seen them on different Danish food blogs. What I found was a lack of description and direction on the details on how to make them. For example, what is the best way to break up the very hard Pre-dough and there were no descriptions anywhere of how big the hearts should be, when cut out. So this has really been a trail and error ordeal, but the hearts turned out wonderful and they tasted just like I remember them, like Christmas 😀

Mixing dough can be a rough ride, chop Pre-dough into small pieces to make mixing easier. Image #2 is dough after 3 minutes of mixing, image #3 is dough after 6 minutes of mixing. Dough will be very sticky.

Mixing dough can be a rough ride, chop Pre-dough into small pieces to make mixing easier. Image #2 is dough after 3 minutes of mixing, image #3 is dough after 6 minutes of mixing. Dough will be very sticky.

Making Honninghjerter is a very long process. If you want them ready for Christmas, you should make the Pre-dough around mid November. The Pre-dough should rest for 1 month but you can probably get away with less, if you get a late start. The Pre-dough will get very hard after a month of resting, and this is normal. I found the best way to break up the hard dough is by carefully inserting the tip of a sharp knife and twist the knife to break loose the dough. The smaller the pieces, the easier it will be to mix everything up later, so feel free to give the dough a quick chop after it’s broken up.

Dough will be very sticky, use plenty of flour for rolling.

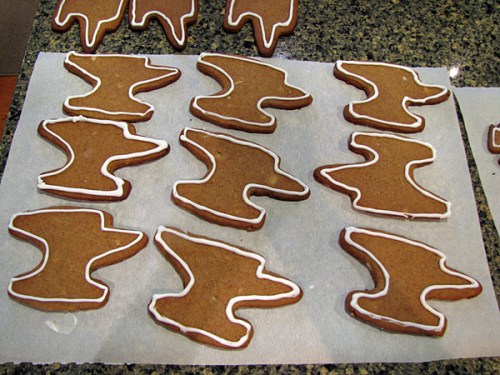
Using a cookie cutter will save you time. My pre-baked hearts were 11 cm wide (4.3 inches) which were a little too big. Note: dough will spread out quite a bit during baking. When rolling the dough it will be very sticky, use plenty of flour for rolling.

As for the size of the hearts I didn’t know what size cookie cutter to buy, so I simply just cut a template out of paper and cut them out with a knife (which turned out to be very time consuming). My pre-baked hearts measured 11 cm wide (4.3 inch) but grew quite a bit during baking to 15 cm wide (5.9 inch). The hearts are suppose to be big but I thinks mine turned out jumbo 🙂 so I would recommend scaling them down a bit.

After baking the heart will be a little hard. They now need to rest with a moist towel in the refrigerator for 3-4 days. This is how I did it without the towel resting directly on the hearts.

After baking, the heart will be a little hard. They now need to rest with a moist towel in the refrigerator for 3-4 days. This is how I did it without the towel resting directly on the hearts.

Honninghjerter – Honey Hearts (makes 13 large)

Ingredients:

Pre-dough: (made 1 month ahead)

500 gram honey

500 gram all-purpose flour

Directions for Pre-dough:

Pour honey in a small cooking pot and heat to 40-50 degrees Celsius (104-122 degrees Fahrenheit). Combine warm honey and flour until a smooth mass, place into a container and seal with lid. Store container in a cool, dry place for a minimum of 1 month. The honey pre-dough will get very hard, which is alright. It will soften up again later in the recipe.

Honninghjerter dough:

2 egg yolks

10 gram hjortetaksalt

10 gram potaske

1 tablespoon water

Pre-dough, chopped into small pieces

5 gram ground cinnamon (approx 1 small tablespoon)

5 gram ground ginger (approx 1 small tablespoon)

5 gram ground cloves (approx 1 small tablespoon)

200 gram dark chocolate (for decorating)

Directions for Honninghjerter:

The Pre-dough will now be very hard. Take a sharp knife and carefully start chipping away at the hard dough. Put tip of knife into dough and give a twist to break up the dough little by little. Smaller pieces of honey dough will make your work easier later on, so if you have big chunks, chop them smaller.

Mix egg yolks with hjortetaksalt, set aside. Stir potaske into water until completely dissolved, set aside. Place pre-dough pieces into the bowl of a stand-mixer (the mixing can also be done by hand but will require a lot of muscle). Add egg mixture and potaske mixture to dough. Add cinnamon, ginger and ground cloves. Start mixer on low for 3 minutes, it will be a rough ride. Increase speed to high and mix for another 3 minutes, dough will now become smooth and very sticky.

Preheat oven to 180 degrees Celsius (350 degrees Fahrenheit). Line baking sheets with parchment paper and sprinkle paper lightly with flour, set aside.

Sprinkle a very generous layer of flour onto your work surface and scrap dough out onto floured surface (using a wooden spoon works really well for scraping out the sticky dough). Sprinkle more flour on top of dough and give a quick knead. Roll dough out to 4 mm thickness (0.15 inch), sprinkle more flour as needed. Press or cut out heart shapes, using a spatula, place hearts onto baking sheets leaving 5 cm  (2 inches) distance between hearts. Repeat rolling of scrap dough and cutting out hearts until dough is used up. Bake hearts for 8-10 minutes. Test for doneness by gently pressing a finger into center of heart, when done it should spring back and not leave a finger imprint.

Storing hearts: Allow hearts to cool completely. Using a pastry brush, remove excess flour from bottom of each heart. At this point the hearts will be quite hard and they now need to soften up for a couple of days in the refrigerator. Place hearts in a container with a moist clean towel. I did this by lining a box with plastic, place hearts inside box, then one of my cooling racks and then the moist towel. The rack just prevents the moist towel from resting directly on the hearts. Seal container and store in refrigerator for 3-4 days. After the four days, continue to store hearts in refrigerator in a regular contain, but without the moist towel. Hearts can last for over a month in refrigerator. Note: remove only the hearts that you need, brush with melted chocolate and enjoy the same day. Glædelig Jul and Merry Christmas.

Honninghjerte

Honninghjerte

Source: Claus Meyer

Print Friendly and PDF

Read Full Post »

Cranberry-Walnut Chocolate Chip Cookies

Cranberry-Walnut Chocolate Chip Cookies

I have been on the hunt for a go-to-cookie for a long time now. One that fits anytime of the year, one that is quick and easy to make and I think I have finally found one. I have made these both with and without the walnuts, not everybody like nuts you know, and they are equally good with and without. They tend to spread out a little more without the nuts, but that’s OK. These cookies have a wonderful background flavor of brown sugar, which reminds me of a Blondie, and the combination of walnuts and cranberries gives them a slight crunch and makes them nice and soft, all at the same time. These cookies are definitely a keeper and I think you’ll really enjoy them as well.

IMG_4909

Roll dough into 1 1/2 inch balls

Ingredients:

2 3/4 cup all-purpose flour (360 grams)

1 teaspoon baking soda

1/2 teaspoon baking powder

3/4 teaspoon salt

1 cup butter, room temperature (226 grams)

3/4 cup sugar (155 grams)

1 cup packed brown sugar (185 grams)

2 large eggs, room temperature

2 teaspoons pure vanilla extract

10 oz. semi-sweet chocolate chips (280 grams)

1 1/2 cup dried cranberries (140 grams)

1 cup chopped walnuts (112 grams)

Directions:

Line baking sheets with parchment paper and set aside. Preheat oven to 350 degrees Fahrenheit (175 degrees Celsius).

Sift together flour, baking soda, baking powder and salt, set aside. Cream butter and sugars until smooth and soft, about 2-3 minutes. Add eggs one at a time and beat until smooth. Add vanilla and mix until fully incorporated, scrape down sides of bowl as needed. With mixer on low, add flour in three increments and mix only until fully incorporated. Add chocolate chips, cranberries and chopped walnuts, mix only until incorporated. Working quickly, roll dough into 1 1/2 inch balls (approx. 4 cm), place on prepared baking sheet 2 inches apart (5 cm). If dough feels very soft when rolling, place baking sheet with dough balls in refrigerator for 5 minutes before baking. Bake for 16-20 minutes or until done. Cool and baking sheet for 2 minutes before transferring to cooling rack. Enjoy!

Freshly baked Cranberry-Walnut Chocolate Chip Cookies

Freshly baked Cranberry-Walnut Chocolate Chip Cookies

Source: adapted from Bakerella

Print Friendly and PDF

Read Full Post »

Norwegian Julekake

Julekake is a Norwegian Christmas Bread which is really easy to make. The original recipe called for candied citron which I think is what we reffer to as “Sukat” in Denmark. I had neither on hand but I did have candied orange peel which I believe is more or less in the same family. The candied orange peel does render a very unique flavor to the bread, a flavor you either love or hate 🙂 So if your not a fan, you can always just leave it out or maybe replace it with some dried cranberries, yum!

Making Julekake

The bread is served either warm or toasted with soft butter or some jam. I would like to point out that the unique candied orange flavor goes really well with Nutella, although I don’t think Nutella would be a traditional way of serving the bread, but delicious nonetheless.

Julekake (makes 1 loaf)

Ingredients:

1/4 cup butter

2 1/4 teaspoons active dry yeast (or 25 grams cake/fresh yeast)

1/4 cup water

1/2 teaspoon sugar

1/2 cup milk

1 egg

1/4 cup sugar

1/4 teaspoon salt

1/2 teaspoon cardamom

2 1/2 cups all-purpose flour

1/4 cup candied orange peel, diced (candid citron or Sukat)

1/4 cup dried cherries

1/4 cup raisins

1 egg, for egg wash

Directions:

Melt butter and set aside. Combine water, 1/2 teaspoon sugar and milk in a small sauce pan, heat to 100-110 degrees F and remove from heat. Sprinkle yeast over warm milk, give a quick stir and let sit 10 minutes. Place fruit in a small bowl with 1-2 tablespoons of the flour, mix to coat fruit with flour, set aside. Pour milk/yeast mixture into bowl of stand-mixer fitted with the dough hook. Add egg, 1/4 cup sugar, salt, cardamom and butter, start mixer on medium-low. Add flour in increments and finally add the fruit. Place dough on flour dusted work surface and knead briefly until smooth. Place dough in a greased bowl, cover with a clean, dry tea-towel and let rise for 1 hour or until double in size. Line a baking sheet with parchment paper and set aside. Give dough a quick knead to deflate and place on baking sheet. Cover dough with tea-towel and let rise for another 45 minutes. Preheat oven to 350 degrees F. Lightly beat egg to make an egg wash. Brush dough with egg wash and bake for 30 minutes. Note: you may need to cover bread loosely with foil after the first 20 minutes of baking to avoid over-browning. Serve warm or toasted with butter or jam. Glædelig Jul and Merry Christmas!

Source: adapted from Mrs. Sig Score

Print Friendly and PDF

Read Full Post »

Older Posts »

%d bloggers like this: