Strawberry Rhubarb Champagne Jam
Let me tell you about this perfectly delicious Strawberry Rhubarb Champagne Jam. This jam has a really intense flavor, a fabulous bright red color and a slightly loose set (which I like). It reminds me of a perfectly clear and sunny September afternoon with no humidity, simply perfect! My husband, who never really cared for jam before, is going crazy over this jam and it has now become his favorite special treat.

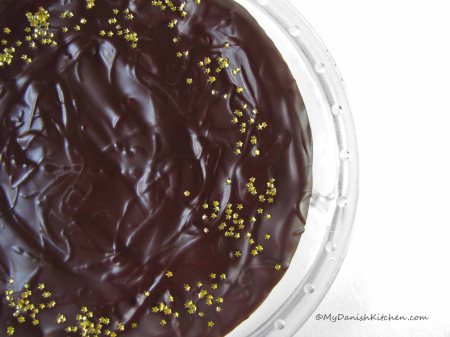
Strawberry Rhubarb Champagne Jam
I have been interested in making my own jam for a long time but it always seemed really complicated. There is a lot to learn about canning, enough to write a book, which is not my intention in this post. So I am going to recommend that you invest in one or two books to help you understand the entire process and to be able to obtain a product that is safe to eat and has a long shelf life.

Making Jam
I don’t have all the equipment that is suggested but after having made this jam a couple of times, I now know what equipment is essential to make the process easier for myself. Ideally you want a canning pot which comes with a rack that holds the jars, however, a large stock pot can do the same job but it must be large enough to cover jars with 1 inch of water and to prevent the jars from cracking you can place a small folded clean dish towel or a stainless steel trivet at the bottom of the pan. You also need a wooden spoon, a small stainless steel ladle, stainless steel tongs to lift hot jars in and out of the boiling water, rubber coated jar lifter to transfer filled jars upright back into boiling water and finally glass Mason jars, screw-top rings and lids. You can reuse Mason jars and screw-top rings but the lids must always be new to ensure a proper seal.

Jam Test
There are numerous rules when you are canning and many of these rules should not be altered. To prepare myself for this adventure I went out and purchased a couple of books to learn from. The first one is Southern Living Little Jars, Big Flavors and what I love about this book is the very clear layout of the entire canning process. It explains why all of these steps are so important to follow and it points out which ingredients and methods should not be changed. Of course the book also has a lot of small-batch recipes with gorgeous pictures to get you inspired.
The second book I purchased is called Get Started Preserving. This book does a great job explaining how the natural pectin and acid content in fruit help achieve a jelly or “set”. It has some great charts which show pectin and acid content of key fruit, vegetables and fruit freezing times and a chart which shows water bath heat processing times for key fruits. The book also has an easy to read section on how foods spoil and the science of preserving. The book is loaded with photographs and it covers a wide variety of preserving from simply freezing fruit and vegetables, to bottled fruit in alcohol, salt preserves, pickling, fruit cheese, jams and jelly, fruit curd, cured fish and cured meats. The downside to this book is that the entire canning process is not as clearly laid out, when compared to the first book I mentioned.
Now that I have managed to completely turn you off to preserving your fruit, let me say this. Yes, there are a lot of rules to follow in order to keep you and your family safe when eating your wonderful canned goods. But if you set out to learn about the process (which is what I recommend) before attempting the process, and you know the steps involved, it is really a fun afternoon activity and the result is so much better than the store-bought jams. Now go do some canning and try not to kill anyone in the process, just kidding. 🙂
Strawberry Rhubarb Champagne Jam (makes approx 3 small 8 oz jars, depending on how much tasting you do along the way)
Ingredients:
460 gram strawberries (16.2 oz or about 3 cups), washed, hulled and quartered
140 gram rhubarb (4.9 oz or about 1 cup), washed and sliced
390 gram sugar (13.8 oz or 2 cups)
1 1/4 cup champagne (or sparkling wine)
4 tablespoons lemon juice
1 tablespoon pectin
Directions:
Wash mason jars and lids in hot soapy water and rinse thoroughly.
Place a couple of small saucers in the freezer to do the jam test on later.
To sterilize jars you can use a canning pot which comes with a wire rack, or if you don’t have a canning pot, you can use a large stock pot and place a trivet or a folded up clean towel in the bottom of the pot. Fill the pot with hot water and place clean jars upright into the water making sure they are covered by 1 inch (2.5 cm) of water. Bring water to a rolling boil over high heat. Boil for 10 minutes, then reduce heat and continue to simmer until you are ready to fill jars. Note: jars must be hot when the hot jam is filled into them. Place lids and rings into a heatproof dish making sure to spread them out so they don’t clump together. Fill dish with hot water and let the lids sit in water until ready to use.
Combine strawberries, rhubarbs, lemon juice and champagne in a heavy-bottomed pan. Stir over low heat and let fruit simmer for 5 minutes. Mash fruit with a potato masher if desired. Stir pectin into sugar and add to the fruit all at one time. Stir until sugar has dissolved and simmer for another 15 minutes. Then bring the jam up to a rapid, rolling boil for 5 minutes. Start testing for set when the bubbles become larger and start to “plop”.
Take the pan off the heat while you test for set. To test for set, remove one of the saucers from the freezer and pour a tablespoon of jam onto the cold plate. Let it cool for a minute then run a finger through the jam. If the jam wrinkles and your finger leaves a trail, the jam is set. If jam is still runny, continue to boil and test again.
Once your jam is set, remove from heat and skim off any foam that settles on the surface. Remove hot sterilized jars from simmering water, one at the time, and fill with hot jam leaving 1/4 inch (6 mm) head room between jam surface and lid. Wipe the rims clean of any spilled jam using a paper towel dipped in hot water. Quickly place a lid, rubber side down on top of each jar. Place a ring onto each jar and screw on until just fingertip tight, do not over-tighten. Then heat process the jam by placing the sealed jars upright back into the simmering water and heat proof for another 10 minutes. Make sure jars stand upright the whole time and the lids are covered with 1 inch (2.5 cm) of water. Use tongs to remove processed jars, making sure to continue keeping them upright. Transfer them to a clean towel-lined surface where they can sit undisturbed 12 to 24 hours. Lids may make a popping sound as the jars cool, this is a sign of an airtight seal. Test the seals 24 hours after heat processing by pressing down on the center of each lid with your finger. If the lid does not move or pop, the jar is sealed. Label and store in a cool, dark place and refrigerate after opening.
Note: if you end up having some left-over jam, ladle it into a jar, place in refrigerator and use within a few days.
Source: adapted from Downton Abbey Cooks