Veggie Lasagna Roll-up
My husband Joe is a meat lover so when I told him that I was making vegetable lasagna roll-up he immediately wrinkled his nose and I assured him that he was going to love it. And while I was cooking the sauce he kept asking me if I was adding some sausage to the sauce, but I stood my ground with a firm “no” 🙂 And when it finally came time to taste the much anticipated lasagna roll-up, guess what, he loved it and I must say that this recipe really is wonderful…even without meat.

Separate and cover noodles until ready to use. Spread ricotta cheese, roll tightly, place in pan.
I am always looking for good recipes that you can cook ahead, freeze and then thaw and cook for those nights when you come home tired from a long day at work. I love this recipe because it can be made into small portions, it is loaded with delicious vegetables and there is less cheese involved than a regular lasagna. Of course you can always add some meat to the recipe or change the vegetables around as you please, but all kidding aside, this recipe will definitely be a staple recipe here at our house and sometimes there may even be some meat in it.
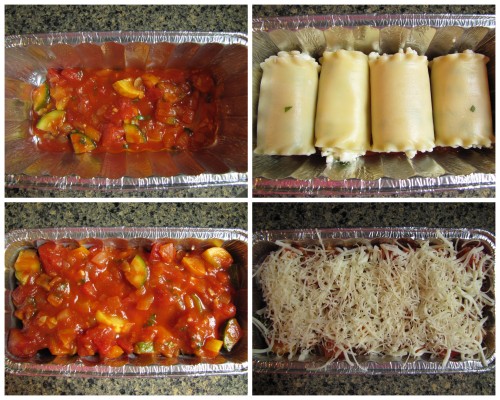
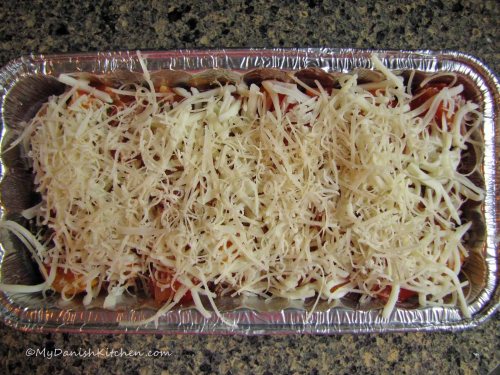
Layer: sauce, rolled up noodles, sauce and a thin layer of cheese.
Veggie Lasagna Roll-up, makes 3 foil loaf-size pans
Ingredients:
12 lasagna noodles
For the sauce:
2 tablespoons extra virgin olive oil
1 onion, diced
1 orange bell pepper, diced
3 large cloves of garlic, minced
1 zucchini, cut into bite size chunks
1 yellow squash, cut into bite size chunks
mushrooms, sliced or diced
1 cup white wine
salt and pepper, to taste
14 oz diced tomatoes
3 tablespoons tomato paste
1 cup of your favorite marinara sauce
1/2 cup grated Parmesan cheese
For the cheese filling:
15 oz ricotta cheese
1 egg
1/4 cup grated Parmesan cheese
large bunch fresh basil
salt and pepper
For the topping:
Your favorite Italian cheese (I used a store-bought blend of Mozzarella, Asiago, Provolone and Romano)
Directions:
Cook lasagna noodles in salted water according to package directions, drain and rinse with cold water. Line a baking sheet with plastic wrap and place one layer of noodles, alternate plastic wrap with noodles ending with plactic wrap on top, to prevent the noodles from drying out. Set aside.
To make sauce: heat olive oil in a large cooking pot, add onions and bell pepper, cook until onions are starting to turn translucent. Add garlic, zucchini, squash and mushrooms, cook for a few minutes. Pour in wine and cook another 1-2 minutes. Add salt and pepper, diced tomatoes, tomato paste, your favorite marinara sauce and Parmesan cheese, simmer 15-20 minutes.
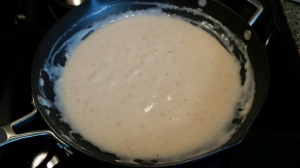
To make cheese filling: in a small bowl add ricotta cheese, egg, Parmesan cheese, salt and pepper and chopped basil, stir to combine.
To assemble: line up 3 loaf-size foil pans. Spoon a small amount of sauce into bottom of loaf pan. Lay out 4 lasagna noodles and spread each noodle with a thin layers of ricotta cheese mix. Roll each noodle up tightly and place on top of sauce inside foil pan. 4 rolled up noodle will fit inside each pan. Top noodles with more sauce and your favorite cheese. Close pan off with tinfoil. Repeat with remaining ingredients. Cook immediately or let cool down in refrigerator before placing in freezer.
When ready to bake preheat oven to 350 degrees F and cook covered for 40 minutes. Turn heat up to 400 degrees F and continue to cook uncovered for 15 minutes or until cheese is golden in color. Enjoy!
Source: adapted from Ree Drummond

Read Full Post »


")


