Feeds:
Posts
Comments

Posts Tagged ‘cookies’

Finnish Christmas Stars

This is without a doubt the craziest dough I have ever worked with! When I first read the directions I was a little confused. It was unclear to me if they were asking for 1 1/2 cups of whipping cream or 1 1/2 cups of whipped cream. It turns out you start with 1 1/2 cups of heavy whipping cream which is then beaten into whipped cream with soft peaks. As I went on making this dough I had some serious doubts about it. When the dry ingredients are mixed with the whipped cream it becomes crumbly and then when the soft butter is worked in it becomes sticky. It does however set up nicely in the refrigerator. Finally when the dough is rolled out, make sure your work surface is floured very well. At this point the dough becomes very easy to work with and rolls out beautifully. If you are unfamiliar with the rolling and folding three times procedure it is basically the same as if your making Wienerbrød or Birkes although this is not a puff pastry dough and you can read and see more pictures of the folding process on those two pages.

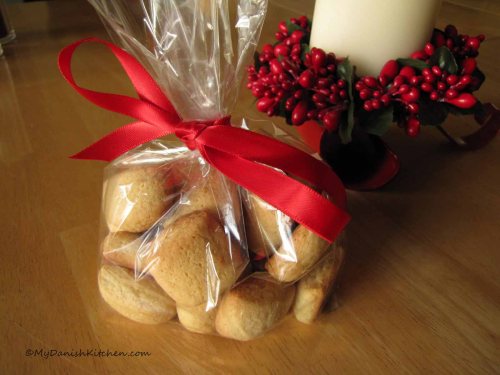
The final outcome was a beautiful star shaped cookie, tender and buttery with a delicious sweet, yet tangy, prune center. The cutting and folding of the cookies is a fun process which would be a great activity with older children. The Joulutortut cookies were definitely worth the effort!

Joulutortut – Finnish Christmas Stars (makes 30 cookies)

Ingredients:

For Prune Filling:

5 oz. pitted prunes

water to cover prunes

1 tablespoon lemon juice

1/4 cup sugar (2 oz.)

For the dough:

2 cups all-purpose flour (24 oz.)

1 teaspoon baking powder

1 1/2 cup heavy whipping cream (12 0z.)

1 cup butter, at room temperature (8 oz.)

For finishing:

1 egg, beaten, for egg wash

Pearl sugar, for sprinkling

Directions:

Place prunes and water in a small saucepan and simmer until prunes become very soft, 15-20 minutes. Pour prunes, lemon juice and sugar into a blender and puree. Set prunes aside to cool.

Prepare baking sheets with parchment paper, set aside.

Sift together flour and baking powder, set aside. Measure 1 1/2 cups heavy whipping cream, beat whipping cream until it starts to thicken (soft peaks). Using a spatula, add flour to whipped cream, mixture will be crumbly. Now using your hands, work the soft butter into the mixture until well combined, the dough will be sticky. Wrap dough in plastic wrap and refrigerate for 1-2 hours.

Preheat oven to 200 degrees C (390 degrees F)

Making sure your work surface is well floured, roll the dough out to a rectangle. Fold dough into thirds, rotate dough a quarter of turn and fold into thirds again, making a small square. Turn over dough. Repeat rolling and folding another two times. Finished rolled out dough should be 15×18 inches, trim off edges to get straight lines. Measure and cut dough into 3 inch squares. Then make small cuts in towards the middle of each square. First move each cut square onto baking sheets, then place a small teaspoonful of prune filling in the center of each square. Fold every second corner into the middle of each square, creating a star shape. Brush with egg wash making sure the center gets a good amount of egg wash to prevent the star from opening up during baking. Sprinkle with Pearl sugar (or regular caster sugar). Bake for 10 minutes or just until golden. Cool on baking sheet for 1-2 minutes before transferring stars to a cooling rack. Enjoy!

Source: The Great Scandinavian Baking Book

Print Friendly and PDF

Read Full Post »

Norwegian Krumkager

Back in 2005, Joe and I took a week long class at John C. Campbell Folk School. We were at the school during their Scandinavian Heritage week which we figured would be the ideal time for us to be at the school. Joe took a blacksmithing class and I took Scandinavian baking which was so much fun and gave me a lot of confidence in my baking skills. Campbell Folk School is located in the southern Appalachian mountains by Brasstown, North Carolina and the campus is set in the most beautiful and serene location. The school is based on the Danish concept of Folkehøjskole which is an adult non-competitive learning experience. Campbell Folk School offer a wide variety of classes based on American traditional arts and crafts such as basketry, dance, drawing, enameling, leather, metalwork, music, photography, woodworking and so much more. I have written about my experience at Campbell Folk School before when I made Wienerbrød and making these Norwegian Krumkaker brought back wonderful memories about our experience there. I can honestly say that is was one of the most rewarding, exciting and at the same time peaceful experiences I have ever had. To get a feel for the atmosphere at the Folk School check out their blog.

Me at John Campbell Folk School practicing decorating a delicious layered cake.

Me at John Campbell Folk School practicing decorating a delicious layered cake.

Krumkake is a delicate and delicious Norwegian waffle cookie which is traditionally served during the Christmas holiday. I first learned to make this classic waffle while taking my Scandinavian baking class at Campbell Folk School. Making the waffle does require an Krumkake iron and a cone shaped roller which can be purchased pretty easily these days online. The cookies can seem a little tricky to roll at first (careful, they are hot) but after a couple of cookies you’ll quickly get the hang of it. They can be rolled into a cone shape, a cylinder (by using the handle of a wooden spoon) or simply served as a flat round disc. The filling choices are numerous and only limited by your imagination but traditionally they are served with whipped cream and fresh berries.

Norwegian Krumkake

Krumkake – makes 38 Krumkaker

Ingredients:

4 large eggs, at room temperature

200 gram butter (7 oz.)

200 gram sugar (7 oz.)

200 gram flour (7 oz.)

2 tsp vanilla extract or 1/2 tsp ground cardamom

warm water to get correct batter consistency (I used 14 tbsp)

Special equipment required: Krumkake iron and a Krumkake roller (if not already included with your iron)

Directions:

Melt butter and set aside. Add eggs and sugar to a bowl and beat on high until thick and pale yellow in color. While continuing to mix, pour the melted butter, in a thin stream, into the egg mixture. Add your choice of either vanilla extract or cardamom and while continuing to mix, add  flour in small increments. If batter is too thick, add warm water to correct consistency.

Note: follow your Krumkake iron manufactures instructions regarding temperature settings, if iron needs to be greased and cooking time. Using the krumkake roller will give you a cone shape and using the end of a wooden spoon with give a cylinder shape.

Place a large piece of parchment paper onto your counter top next to the Krumkake iron. I taped the corners of the paper down to keep it from moving around.

Pour a generous tablespoon of batter onto your hot krumkake iron, close lid and cook until ready (30-45 seconds). Using a small offset spatula or a butter knife, quickly lift the soft krumkake onto the parchment paper and roll into desired shape. Keep the cookie on the roller for 1-2 minutes to allow it to take its shape before sliding the cookie off the roller and placing it onto a baking sheet to cool completely. Store cookies in an airtight tin until ready to serve. Fill cones with your favorite filling right before serving and enjoy.

Krumkake serving suggestions: whipped cream with fresh berries, soft ice cream, preserves or jams, pudding, custard or Carole’s Almond Pudding (recipe follows)

Carole’s Almond Pudding:

Ingredients:

1 small package instant vanilla pudding (95 gram or 3.4 oz.)

1 cup heavy whipping cream

1 cup milk

1/4 – 1/2 tsp almond extract

Directions:

Beat all ingredients together for 1-2 minutes until desired consistency and keep cool in refrigerator until ready to serve. Pipe into krumkaker cookies and serve immediately.

Source for Krumkake: adapted from Tine.no

Source for Carole’s Almond Pudding: my friend and coworker Carole Yoder

Print Friendly and PDF

Making Krumkaker

Read Full Post »

Kransekage Bites

The last day of the year has arrived and I wish all of you a Happy New Year and since it’s New Years Eve today lets wrap up the year with some traditional Danish Kransekage.

Kransekage is a classic Danish pastry made with Marzipan. It is often eaten for New Years, Weddings, Anniversaries, Baptisms – occasions when a celebration is in order. Kransekage can sometimes be made into quite elaborate presentations such as my Anniversary cake but other times they are made as small triangular bite-size pieces of Kransekage, equally delicious!

You can also make them into small Kransekage Tops as in the picture at the bottom of the page. If you choose this, don’t refrigerate the marzipan dough as it will be softer and more manageable at room temperature. Place dough in a pastry bag with a large star tip, but I have to forewarn you that it will take a lot of strength to press the dough out of the pastry bag onto the parchment paper. Another thing you can do to your Kransekage, which I did not do here, is to dip the bottom in some chocolate. Very delicious! I hope you have a safe and happy New Year. 😀

Kransekage Bites (makes 10-12 pieces)

Ingredients:

Cake:

250 gram Marzipan (cut into slices)(8.8 oz or 8 3/4 oz)

75 gram confectioners sugar(2.5 oz or 2 3/4 oz)

20 gram pasteurized egg whites(0.7 oz or 3/4 oz)

Glaze:

40 gram confectioners sugar (sifted),( plus more if needed)(1.4 oz)

15 gram pasteurized egg whites(0.5 oz)

Directions:

For the Cake: In a stand mixer with the paddle attachment, place 75 grams confectioners sugar and 20 grams pasteurized egg whites. Start the mixer on low and add marzipan pieces one by one. When the cake mass is homogeneous, remove from mixer and place in a zip lock bag. Store in refrigerator for at least 2 hours or until the following day.

Double up two large baking sheets for extra insulation to avoid burning the bottom of cake. Use parchment paper. Preheat oven to 390 degrees F (200 degrees C).

Note: when rolling out marzipan, wash and dry your hands as often as needed to avoid working with sticky fingers. If marzipan feels too sticky use a small amount of confectioners sugar to work into dough. Sprinkle work surface lightly with confectioners sugar. Roll dough into a long log approximately 1 1/2 cm (0.6 inch) in thickness. Cut log into finger length pieces (8 cm/3 inches). With two fingers lightly pinch and press down on each log piece to form a soft triangular-shape. If needed, use an icing spatula or a regular spatula to loosen marzipan from tabletop by pressing down hard while sliding spatula under the log. Place each triangular log on parchment paper and bake for 14 to 18 minutes or until golden brown. Allow logs to cool completely on a rack.

For the glaze: Beat together sifted confectioners sugar and pasteurized egg whites on high-speed for at least 5 minutes. The glaze should be pretty thick and no longer flow together when beaters are stopped. Add more sifted confectioners sugar as needed. Load glaze into a plastic bag and snip off tip to create a very tiny opening. Begin decorating, moving the tip back and forth across the logs making sure to extend the tip out over the edge to allow the glaze to droop down the outside in a loop style fashion. Allow glaze to dry at room temperature for a couple of hours before storing Kransekage Bites in an airtight container. Enjoy.

Kransekage Tops

Source: My Danish Kitchen

Print Friendly and PDF

Read Full Post »

Brunkager

Brunkager

This year I decided to try out a new recipe for Brunkager. I view this recipe as a more modern Brunkage in that, the finished product is a small rectangular cookie instead of the traditional round shape and it has pistachios in addition to almonds. The cookies are very flavorful and delicious and the only problem I had was with the aesthetic outcome. I was not able to find any whole almonds and pistachios, all I could get was almond slivers and unsalted pistachio halves and pieces. Of course now that it’s all said and done I finally found the right kind of nuts…bummer… oh well. As far as the almonds, use what you have, but whole would be perfect. But for the pistachios, I would recommend that if you cannot get whole then don’t bother with it because it really wont give you the beautiful green “wow” effect that whole pistachios would provided.

This recipe also uses Potaske which is a leavening agent commonly used in some Danish baked products. Potaske can be substituted with Baking Soda which is what I used in my previous Brunkager recipe. If you use Baking Soda you can omit the 1 tablespoon cold water. Simply just mix the Baking Soda in with the dry ingredients.

I hope you enjoy these cookies, they are a wonderful addition to any Christmas repertoire.

Brunkager II

Brunkager (makes approx. 110 cookies)

Ingredients:

250 gram butter (8.8 oz.)

125 gram dark syrup (4.4 oz.)

250 gram dark brown sugar (8.8 oz.)

2 teaspoon potaske

1 tablespoon cold water

3 teaspoon ground cinnamon

1 teaspoon ground cloves

2 teaspoon ground ginger

1 teaspoon ground allspice

500 gram all-purpose flour (17.6 oz.)

30 gram whole unsalted pistachios (1 oz.)

120 gram whole blanched almonds (4 oz.)

Directions:

Using a 20 x 20 centimeter (8 x 8 inch) container, cut 2 pieces of parchment paper to fit inside the dish without it crimping up in the corners. Place parchment paper in a cross fashion with paper extending over the edges. Set aside.

Place butter, syrup and brown sugar in a sauce pan and melt over medium-high heat. Once ingredients are melting, whisk vigorously until it comes together. Remove from heat.

Combine potaske and water, set aside. Combine flour, cinnamon, cloves, ginger and allspice in the bowl of a stand-mixer fitted with the hook attachment. Add potaske/water mixture to the warm butter/syrup mixture. Pour the warm butter/syrup mixture into the flour mixture and mix until a homogeneous mass. Add pistachios and almonds and continue mixing until combined.

While batter is still warm, pour into dish lined with parchment paper and press the mixture into corners and flatten. Cut another piece of parchment paper to fit and place on top of dough. Fold overhanging edges of paper in over batter and allow to cool at room temperature until the following day. Next day, remove dough from dish and cut into 4 logs. If you plan on baking the cookies at this point, cut logs into thin slices and place on baking sheet lined with parchment paper, leaving a 1 inch space between cookies. Bake in a 180 degree C (350 degrees F) preheated oven for 9 – 12 minutes. Allow cookies to cool completely before placing in a cookie tin with a tight fitting lid.

If you plan on baking cookies on a later date, wrap each log tightly in plastic wrap, place in a zip-loc bag and store them in refrigerator for 1-2 weeks. Flavors will continue to develop as dough sits. Once ready to bake, allow dough to come to room temperature before slicing and baking.  Merry Christmas and Glædelig Jul.

Brunkager ready for baking

Brunkager ready for baking

Source: adapted from Det Søde Liv

Print Friendly and PDF

Read Full Post »

Sukkerkringler

In Denmark, the word Kringle refers to the knotted pretzel shape and Danes use this shape for many different baked goods like pastries, breads and cookies. The Kringle symbol has a long history in Denmark and it’s the guild sign for the Danish Baker. Even today, it is often displayed as a golden kringle outside the modern Danish Bakery Shop.

Form into ball the size of a walnut, roll to 6 inches long, shape as a pretzel and dip in sugar.

The Sukkerkringle is a Christmas cookie made in the traditional kringle shape. The dough is very quick and easy to make but the shaping of the cookies does require a little bit of patience (this would be a great activity for the teenager in your house :)) The cookie is soft and delicate and dipped in pearl sugar. The pearl sugar is a bigger sugar crystal which I have found online, however, if you don’t have it in your house you can use crushed sugar cubes and if you don’t have sugar cubes then just use a light coating of regular sugar…you get the idea.

Pearl sugar

Sukkerkringler

Ingredients:

3 cups all-purpose flour

1 cup salted butter

1 teaspoon baking powder

1 egg

1/2 cup heavy whipping cream

Pearl sugar for decoration

Directions:

Line two large baking sheets with parchment paper and set aside.

Place flour, butter, baking powder, egg and whipping cream in a food processor or a large bowl. Mix until combined and a ball of dough is formed, careful not to over-mix. Wrap dough in plastic wrap and place in refrigerator for 30-60 minutes.

Preheat oven to 350 degrees F (175 degrees C). Place a small amount of pearl sugar onto a small plate and set aside.

Remove cooled dough from refrigerator and divide into pieces the size of a small walnuts, roll into balls. Sprinkle a very small amount of flour onto your work surface if needed and roll each ball into a 6 inch long rope. Take each end of the dough and curl them up onto the middle of the dough, forming a pretzel shape, gently press a finger into the seam to seal the edges. Lift up the pretzel and place upside down into the pearl sugar, press down gently to make the sugar stick. Place sugar side up onto baking sheet, reshape a little if needed. Bake in the middle of oven for 10-12 minutes. Allow to cool completely before storing cookies in a cookie tin. Enjoy!

Source: The Great Scandinavian Baking Book

Print Friendly and PDF

Read Full Post »

Finnish Coffee Fingers

Here are some Finnish Coffee Fingers for you. There’s no coffee (or fingers) in these cookies but it’s a cookie that goes well with a cup of coffee or Chai tea. I brought them into my work and my co-workers gave me a lot of really nice comments on them. It’s a basic butter cookie which is soft and delicate and has a wonderful sweet almond flavor. If you’re not big on almond flavor you can use vanilla extract instead and top with a different nut of your choice, pistachio would look real pretty 🙂 Of course now it’s no longer a Finnish Coffee Finger but that’s OK because that’s how cookies evolve. Have fun making these cookies!

Finnish Coffee Fingers (makes 35 cookies)

Ingredients:

1 c. unsalted butter, at room temperature

1/2 c. sugar

1 tsp. almond extract (or vanilla)

2 1/2 c. flour

1 egg yolk, beaten with 1 Tbsp. cold water

1/2 c. finely chopped almonds

sugar for sprinkling

Directions:

Using a hand-held or stand mixer, place butter and sugar in the bowl and beat until soft and smooth. Add almond extract and while continuing to mix, add flour in small increments. Mix until dough comes together.

Preheat oven to 375 degrees F. Line two large baking sheets with parchment paper and set aside.

Lightly flour your work surface if needed.  Roll dough into ropes the thickness of a ring finger and cut into 2-3 inch pieces. Gently press the top of dough lightly with the back of your finger. Brush with egg wash and sprinkle with chopped almonds and sugar.

Bake 10 to 12 minutes or until golden.

Source: What About Pie

Print Friendly and PDF

Read Full Post »

Danish Pebernødder

Danish Pebernødder

This year I am trying out a different version of Pebernødder. There is of course numerous different recipes floating around out there but I came across this one which had some very high praises attached to it. Evidently it is from Lagkagehuset in Denmark which is a renowned bakery with several locations in Denmark.

Pebernødder

This recipe is very good indeed, really it is! However, I had forgotten why I choose my original Pebernødder recipe and it was because I am not a big fan of pepper. It’s not that you can taste the pepper per se but it does leave a slight heat on your tongue, which I don’t particularly care for, but that’s just me. But the Pebernød really is very tasty in itself and it bakes perfectly. So if your like me, I suppose we can simply just leave out the pepper 🙂

Ingredients:

125 grams salted butter, at room temperature (4 3/8 ounces)

125 grams dark brown sugar (4 1/4 ounces)

1/2 deciliter heavy whipping cream (1.7 ounces)

250 grams all-purpose flour (8 3/4 ounces)

1/2 teaspoon ground ginger

1/2 teaspoon cinnamon

1/2 teaspoon white pepper

1/2 teaspoon ground cardamom

1/2 teaspoon baking soda

1/2 teaspoon baking powder

Directions:

Line two large baking sheets with parchment paper. Preheat oven to 200 degrees C (390 degrees F).

Beat together butter and sugar until smooth. Add cream and beat until combined. Sift together flour, spices, baking soda and baking powder. Add dry ingredients to wet ingredients and mix until combined. Place dough onto lightly floured working surface, knead dough briefly and divide into four smaller portions. Roll each portion out into logs the size of your middle finger. Cut logs into 1 centimeter (0.4 inch) pieces and place on baking sheets. Bake 10 minutes or until light browned in color. Let cool on baking sheets before storing in an airtight container. Glædelig Jul and Merry Christmas ♥

Danish Pebernødder

Danish Pebernødder

Source: Maden i mit Liv originally from Lagkagehuset

Read Full Post »

World Peace Cookies

This is my second month of participating in The Secret Recipe Club and I was assigned to go sneak around Everyday Insanity’s food blog. Everyday Insanity is a very lovely blog run by Cindy who lives in Utah and who has grown children as well as grandchildren. The blog has an even mix of wonderful savory foods and delicious sweets. Since Christmas is quickly approaching I really wanted to stick with the Christmas theme. When I came across Cindy’s World Peace Cookies I immediately knew what I was making. What could possibly be more appropriate for the Christmas season than World Peace Cookies?

I had already heard wild rumors about how delicious these cookies are and I am here to tell you that the rumors are true. The cookies are fairly simple and quick to make. I did read a piece of good advice which was to remove one tablespoon of flour and it worked out really well. So I measured out 1 1/4 cups flour and then removed 1 tablespoon. The final dough appears a little bit crumbly but simply just press the dough together gently. After the cookies are done baking they may look undercooked to you, but they really are fully cooked so don’t be tempted to over-bake them.

The cookies are slightly crumbly yet a little chewy and wonderful chocolaty with a hint of sea salt. I believe they will become a stable Christmas cookie here at our house. Thank you so much for sharing this recipe Cindy 🙂

World Peace Cookies

Ingredients:

1 stick plus 3 tablespoons unsalted butter (11 tablespoons), at room temperature

2/3 cup packed light brown sugar

1/4 cup sugar

a small 1/2 teaspoon sea salt

1 teaspoon vanilla extract

1 1/4 cups all-purpose flour – minus 1 tablespoon

1/3 cup unsweetened cocoa powder

1/2 teaspoon baking soda

5 ounces bittersweet chocolate (use chips or chocolate that’s chopped into small chocolate chip size)

Directions:

In the bowl of a stand mixer fitted with the paddle attachment, beat the butter until soft and creamy. Add  brown sugar, sugar, salt and vanilla extract. Continue to beat for two minutes more, scraping sides of bowl and paddle as needed.

Sift together flour, cocoa powder and baking soda. With the mixer off, add dry ingredients to butter mixture. Pulse the mixer on low about five times, one or two seconds each time. Continue to mix on low-speed just until the flour disappears into the dough, do not over-mix. The dough will look crumbly. Add the chocolate pieces and mix only to incorporate.

Turn dough out onto work surface, press it together and divide dough in half. Working with one half at a time, press and gently roll the dough into logs that are 1 1/2 inches in diameter. Wrap the logs in plastic wrap and refrigerate them for at least 3 hours.

Preheat oven to 325 degrees, making sure rack is placed in the center of oven. Line baking sheets with parchment paper and set aside.

Using a sharp knife, cut the cold logs into 1/2 inch slices. If the sliced dough cracks, simply just press them together again. Arrange cookies 1 inch apart on baking sheet and bake one sheet at a time for 12 minutes. Do not over-bake cookies even though they may not look done to you. Transfer baking sheet to a cooling rack and let cookies rest until room temperature.

Note: the dough can be refrigerated for up to 3 days or frozen for up to 2 months. If you are using frozen dough, you do not need to defrost it before baking (although it is a lot easier to slice if it’s defrosted) – just slice the logs into cookies and bake for 1 minute longer. Enjoy!

Source: Cookbookhabit via Everyday Insanity

Print Friendly and PDF


Read Full Post »

Anvil Cookies

My husband Joe asked me if I could make cookies in the shape of an anvil. I said “sure, but I don’t think you’ll find an anvil cookie cutter in the stores”. Of course I should have known that it wouldn’t stop him on his quest for anvil cookies. And so he proceeded to make an anvil cookie cutter…is there anything that man cannot make?

Gentile Forge Cookies

The cookie cutter is nice and sharp and it worked like a charm. I choose a delicious chocolate sugar cookie and to make sure the dough does not spread out during baking it’s important to let the cut-out cookies chill in the refrigerator for 15 minutes before baking.

Anvil Cookies

Anvil Chocolate Sugar Cookies (makes 44 cookies)

Ingredients:

For the cookies:

2 3/4 cups all-purpose flour (355 grams)

3/4 cup unsweetened Dutch processed cocoa powder (75 grams)

1/2 teaspoon salt

1 teaspoon baking powder

1 cup unsalted butter (226 grams), at room temperature

1 3/4 cups granulated sugar (350 grams)

2 large eggs, at room temperature

2 teaspoons pure vanilla extract

For the Icing:

2 cups powdered sugar (220 grams)

1 1/2 tablespoons meringue powder (15 grams)

1/4 teaspoon almond extract (can use other extract flavors if desired)

1/4 – 1/2 cup warm water (60 – 120 ml)

food color, if desired

Directions:

To make Cookies: In a large bowl sift together flour, cocoa, salt and baking powder and set aside. In the bowl of an electrical mixer, beat butter and sugar until creamy and smooth (about 3-4 minutes). Add eggs one at a time, beating well after each addition. Add vanilla extract, mix until combined. With the mixer on low, add the dry ingredients. As dry ingredients becomes incorporated you can increase speed. Mix only until it forms a homogeneous dough. Divide dough into two portions, wrap each in plastic wrap and refrigerate for at least 1 hour.

Line baking sheets with parchment paper and set aside. Preheat oven to 350 degrees F (177 degrees C).

Remove one half of dough from refrigerator. Lightly flour your work surface and roll dough out to a thickness of 1/4 inch (6 millimeters). Keep turning the dough so it does not stick to counter. Cut out desired shapes using a lightly floured cookie cutter. Transfer cookies to baking sheets. Place baking sheets in refrigerator for 15 minutes (to prevent cookies from loosing their shape during baking). Bake cookies for 10-12 minutes or until firm around edges. Remove from oven and let cookies cool on baking sheet for a few minutes before transferring them to a cooling rack. Frost with Icing if desired.

To make Icing: Note – for these particular cookies I only iced along the edges of cookies. If you plan on filling in cookies with icing, I would recommend doubling the icing recipe.

In a medium bowl sift together powdered sugar and meringue powder. Add almond extract. Add warm water in increments, while mixing with your electrical mixer. Add food color if desired. Beat on medium speed until smooth and glossy. Proper consistency is when a ribbon of icing falls into bowl and remain on surface for a few seconds. Add more confectioners sugar if icing becomes too thin. Use icing immediately or store in an airtight container covered with plastic wrap directly on the surface.

Be sure icing in completely set before storing cookies in an airtight container. It could take several hours for icing to set.

Source: adapted from Joy of Baking

Print Friendly and PDF

Read Full Post »

Havregrynskugler

Havregrynskugler is a Danish Christmas treat that children of almost all ages can really get involved in making. They are a fun activity and super easy to make and also no-bake.

There are numerous different recipes for Havregrynskugler varying from low-fat to much richer, lower sugar to sweeter as well as adult versions containing alcohol and coffee. I like this version because it does not have a lot of butter, contains Marzipan which I love and it has a slight crunch from the sugar. If you don’t care for the sugar crunch you could substitute with confectioners sugar.

Havregrynskugler

Ingredients:

50 gram unsalted butter, at room temperature (4 tablespoons)

50 gram marzipan (1.75 ounces)

75 gram sugar (2.63 ounces)

125 gram oats (1 1/2 cups)

25 gram unsweetened cocoa (0.87 ounce or 4 tablespoons)

1 -2 teaspoon almond extract

1 -2 teaspoon rum

2 teaspoon seedless raspberry jam

about 100 gram coconut flakes, chopped finely (3.51 ounces)

Directions:

Optional: process oats in a food processor for a few pulses to break up oats a little.

In the bowl of a stand mixer fitted with the paddle attachment add butter and break marzipan into small pieces, cream together until smooth. Add sugar and continue to beat for 1 or 2 minutes longer. Add oats, cocoa, almond extract, rum and raspberry jam, continue to mix until homogeneous.

Form into small balls by pressing the dough together and rolling in your hands. Immediately roll each ball in the coconut. Place covered in refrigerator. Serve cold. Enjoy!

Source: adapted from Kvalimad

Print Friendly and PDF

Read Full Post »

« Newer Posts - Older Posts »

%d bloggers like this: