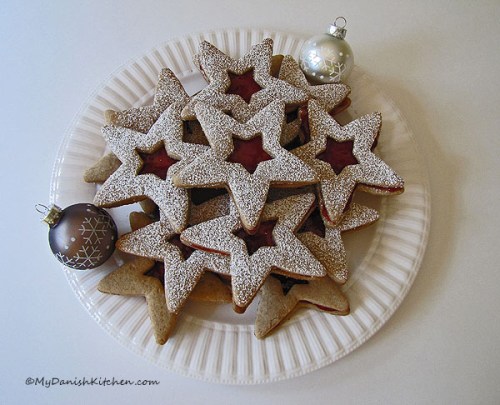
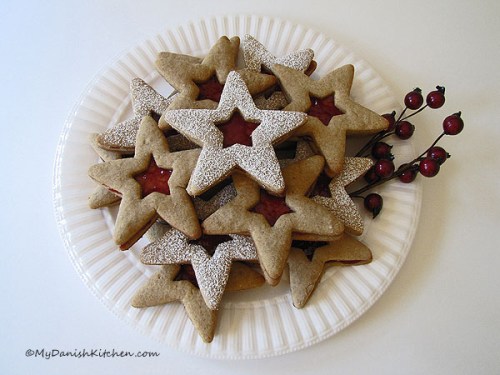
Feeds:
Posts
Comments
Vaniljekranse

Vaniljekranse

Vaniljekranse is a traditional Danish cookie made in the weeks leading up to Christmas.  I have very fond memories of helping my Mom and Dad make vaniljekranse when I was a little girl. It’s a fun process of the dough coming out of the grinder into strips, cutting the strips into pieces and forming them into circles. The cookies have a sweet vanilla flavor and are slightly crunchy on the outside. Making Vaniljekranse makes for wonderful Danish family “hygge” (coziness).

Vaniljekranse are not difficult to make, however, it took some doing to actually make it happen. The reason being, that in Denmark there is an attachment to your meat grinder that has a star shape on it. So the dough is run through the meat grinder with the star attachment. I could probably just have used a pastry bag with a star tip, I tried it, but it takes a lot of muscle to get the dough out. The other option would be to use a cookie press and you can get some sort of circle pattern, but I really wanted to show the making of this cookie the authentic way.

Vaniljekranse

Vaniljekranse

So I described the attachment to my wonderful husband Joe, he looked at the thickness of the meat grinder discs, and him being a Blacksmith and all, he was able to fabricate the disc for me…Yeah! My wonderful husband is so brilliant, I think I’ll keep him  🙂  He helped me make this cookie the authentic way. Thanks Joe.

Update: I have since then been able to buy a star attachment in Bilka in Denmark while we were home for a visit, it fits my KitchenAid mixer perfectly.

Star attachment for KitchenAid

Star attachment for KitchenAid

Star attachment for KitchenAid

Star attachment for KitchenAid

Vaniljekranse

Ingredients:

375 grams flour (13 oz)

125 grams cornstarch (4.4 oz)

375 grams salted butter (13 oz)

100 grams slivered almonds (3.5 oz)

250 grams sugar (8.8 oz)

1 vanilla bean

2 teaspoon vanilla powder

1 egg

Directions:

Place slivered almonds in food processor and blend until a powder. Set aside.

In a large bowl add flour and cornstarch, blend together. Cut butter into small pieces, add butter to flour mixture and blend together on low-speed with a handheld mixer until it starts to become crumbly. Cut open vanilla bean and scrape out seeds. Add vanilla seeds, vanilla powder, almonds and sugar, blend to combine. Add egg and mix to combine. Using your hands, press mixture together until it forms a dough. Wrap in plastic wrap and refrigerate for 1 hour.

Preheat oven to 390 degrees F (200 degrees C). Line baking sheets with parchment paper.

Using the star attachment for your meat grinder, pastry bag or cookie press to form your cookies. Traditionally, you will use a star attachment for your meat grinder. Cut dough into small segments and load into the meat grinder. Run the dough through the star attachment into long strips, place dough onto floured surface. Then cut dough into 4 inch long pieces and form into circle. Place on prepared baking sheets.  Bake in the middle of oven for 8 minutes or until slightly golden. Cool on baking sheets.

Glædelig Jul and Merry Christmas♥

Ground up slivered almonds

Dough coming out of grinder

Strips of dough

Vaniljekranse

Source: adapted from my Mother’s recipe

Print

Coconut Macaroon

Coconut Macaroon

Coconut Macaroons are one of Joe’s absolute favorite cookies and I am right there with him. They are simply delicious! Crisp on the outside, soft and chewy on the inside and they could not be any easier to make. If you like, you can dip the bottom of the cookies in melted chocolate. I do half and half since Joe likes the addition of the chocolate, I however, thinks it takes away from the coconut flavor. Coconut Macaroons do not belong exclusively to Christmas time but they are likely to show up in our house anytime of the year. If you enjoy coconut then I’m sure you’ll love these wonderful little treats.

Coconut Macaroon

Coconut Macaroon

Danish Christmas Tradition: Kalenderlyset (Calendar Candle) and Juledekorationer (Christmas Center Pieces)

In addition to the Advent Reef, in Denmark we also have Calendar Candles which play in important role in the days leading up to Christmas. This tradition became popular under the German occupation in 1942 when Denmark was blanketed in darkness. The candle has the numbers 1 thru 24 printed on it and you light it every day just long enough to burn down one number. Once the candle is burned down to the 24th, it’s Christmas. Back home in Denmark, we would light our calendar candle at the breakfast table and one of us kids got to blow out the candle before it burned down too far.

In Denmark it is also tradition to either buy or make Juledekorationer which are centerpieces with one or multiple candles. My parents always made our own and my Dad really got carried away with this task. We would typically end up with three or four beautiful juledekorationer placed at different locations throughout the house. When making the juledekorationer you can pretty much let your imagination run wild. You can use items like pine cones, cinnamon sticks, small christmas bulbs, bows and fresh greens (pine, holly etc). The juledekoration with its candles bring a calming, beautiful focal point into the room and a sense of that all important Danish “Hygge” (coziness) is created.

This juledecoration was given to me by my Danish friend Kaja

Coconut Macaroons

Ingredients:

2 large eggs

1 cup granulated sugar

1/8 teaspoon salt

1/3 cup all-purpose flour

1 teaspoon vanilla extract

3 cups (9 ounces) sweetened shredded coconut

Direction:

Position a rack in the center of the oven and preheat the oven to 350 degrees F. Grease an insulated baking sheet (or use 2 baking sheets stacked on top of one another).

In a medium bowl, whisk together the eggs, sugar, salt, flour and vanilla extract until well blended. Stir in coconut.

Using a 1-tablespoon measuring spoon,  drop the dough into mounds on prepared sheet, spacing them at least 2 inches apart. Bake the cookies for 14-16 minutes, until they are golden brown around the edges and a few strands of coconut on the tops of the cookie start to turn golden. Cool the cookies completely on the baking sheet on a wire rack. Repeat with the remaining dough.

Once the cookies are cooled completely, you can dip the bottom of the cookie in melted chocolate, if you desire.

Store in an airtight container at room temperature for up to 2 days. Cookies are best on the day they are made.

Glædelig Jul and Merry Christmas♥

Piled like a haystack

Right out of the oven Coconut Macaroon

Source: The Good Cookie by Tish Boyle

Print

Danish Pebernødder

Danish Pebernødder

Pebernødder is a natural part of Christmas in Denmark and there is almost always a small bowl of Pebernødder accompanying the afternoon or evening coffee/tea time. Pebernødder may also be found in decorative paper cones (kræmmerhuse) which are hung on the Christmas tree and pebernødder are also used in Childrens games. Although Pebernødder can be found in practically any store in Denmark, it’s really a fun activity to bake them at home, espically if you have younger children in your household. Baking with your children at Christmas time is an activity that brings closeness and hygge into the home (“hygge” danish word meaning coziness, togetherness, warmth). Kids love rolling the dough into long rolls and cutting them up into bite size pieces, not to mention the added benefit of getting first dips on tasting the cookies once out of the oven. Baking was one of my favorite activities with my parents when I was growing up and they are memories I’ll treasure forever.

Pebernødder is thought to be the oldest Christmas cookie in Denmark and it came, like so many things, from Germany (Pfeffernussen). Directly translated Pebernødder means pepper nuts. In the old days “to pepper” meant to season and they were reffered to as nuts because there was no baking soda back then and so the cookies were hard like nuts. Todays Pebernødder is not hard like nuts but rather crunchy and mildly spicy. Some Pebernødder recipes will have a small amount of white pepper in them, just enough to leave a warm sensation on your tongue, this one does not. This particular recipe is a little milder with a warm cardamom flavor.

Pebbernødder hygge

Pebernødder dough

Pebernødder

Ingredients:

80 gram salted butter (6 tablespoons)

225 gram sugar (1 cup plus 1 tablespoon)

1 egg

1 deciliter whipping cream (1/2 cup)

350 gram flour (3 cups) (add more flour if needed to bring dough together)

1/2 teaspoon baking soda

1 teaspoon ground cardamom

Directions:

Preheat oven to 225 degrees C (400 degrees F). Line baking sheets with parchment paper and set aside.

In a bowl, sift together flour, baking soda, cardomom and set aside.

In your mixer using the paddle attachment, mix together butter and sugar until creamy and smooth. Add egg and mix. Then add whipping cream and mix. Add the sifted dry ingredients to the wet ingredients and mix just until combined. Remove dough from mixing bowl onto a floured surface. Using your hands bring dough together, adding a little more flour if needed until it holds together and forms a ball. Divide dough into smaller pieces and roll into long rolls measuring the width of your fingers. Cut into 1 1/2 centimeter pieces. Place on baking sheets about 1 inch apart and bake for approximately 12 minutes until just turning golden.

Glædelig Jul and Merry Christmas♥

Pebbernødder Christmas parade

Source: Faster Philip

Print

Sparkling Linzer Stars

Sparkling Linzer Stars

I first saw the Sparkling Linzer Star recipe in Better Homes and Gardens magazine many years ago. The cookies are so festive and Christmasy and the process of assembling them is a lot of fun.  The recipe calls for both regular flour and whole wheat flour which makes it a little healthier, but I suppose you could just use all-purpose flour if you’re not into that sort of thing. Make sure to use a generous portion of seedless raspberry jam to increase the “delish” factor.

Flettede julestjerne

Danish Christmas Tradition: Juletræet (The Christmas Tree)

The Christmas Tree tradition has very old roots dating back to at least St. Boniface of Geismar, Germany. There are so many variations of this tradition depending on where in the world your located. In Danmark it’s tradition to put up and decorate the tree on Dec 23rd, although a lot of people now wish to put the tree up earlier. My parents would decorate the tree in the evening of the 23rd (little Christmas Eve) after my siblings and I were sent off to bed. The excitement was so intense that I could barely sleep and waking up to see the beautiful tree the following morning was almost magical. Old tradition for the Danish Christmas Tree is to decorate it with live candles, small Danish flags on a string, the children’s homemade braided paper hearts (flettede hjerter), paper cones (kræmmerhuse), braided stars (flettede stjerner) and some glass bulbs. Christmas in Denmark is celebrated on the eve of Dec 24th. The day of the 24th is spent waiting in anticipation, snacking on fruits, nuts and candy. A light but extra delicious lunch. Family oriented Christmas programs are on TV to help pass the time and finally after a spectacular dinner the time has come. It is time to form a circle around the tree, holding hands and sing Christmas hymns and Christmas songs while dancing around the Christmas tree. The tradition of dancing around the Christmas tree dates back to approximately 1830’s and it’s a tradition seen in Denmark, Norway and Sweden. After everyone has lost their breath from singing and dancing it is finally time to open the presents. And so you see, the glorious Christmas tree plays quite an important role to help create Danish Christmas Hygge.

Sparkling Linzer Stars Ingredients

Sparkling Linzer Stars

Ingredients:

1-1/3 cups butter

2 cups packed brown sugar

1 tablespoon baking powder

1-1/2 teaspoons ground cinnamon

3/4 teaspoon ground allspice

1/4 teaspoon salt

3 eggs

2 teaspoons vanilla

2-1/2 cups all-purpose flour

2 cups whole wheat flour

3/4 cup seedless raspberry jam

powdered sugar (optional)

Star cutouts

Centers cut out

Seedless Raspberry jam

Directions:

Beat butter in a large bowl on medium speed for 30 seconds. Add brown sugar, baking powder, cinnamon, allspice and salt. Beat until combined. Add eggs and vanilla, beat until well combined. Beat in as much of both kinds of flour as you can, stir in remaining flour with a wooden spoon. Divide dough in half. Cover and chill for 1 hour or until firm enough to handle.

Preheat oven to 375 degrees F. Cover cookie sheets with parchment paper. Roll each portion of dough on a floured surface until 1/8 inch thick. Cut into shapes using star cutters (I used a 4 inch and a 1-1/4 inch). Transfer 4 inch cutout cookie dough to prepared cookie sheets. Using the smaller 1-1/4 inch cookie cutter, cut out center from half of the unbaked cookies; remove centers and reroll dough to make more cookies.

Bake in preheated oven for 7-9 minutes or until edges are firm and bottoms are very light brown. Transfer cookies to a wire rack, cool.

Spread the bottom of each solid cookie with a generous amount of raspberry jam. If desired, sift powdered sugar over the cookies with the cutout centers and place atop cookies with raspberry jam, sugar side up. Store in covered container at room temperature for up to 1 week.

Glædelig Jul and Merry Christmas♥

Linzer Stars

Linzer Stars

Source: Better Homes and Gardens

Print

Danish Fedtebrød cookies

Danish Fedtebrød cookies

To me, Christmas time is the best time a year. It is filled with joy, excitement and what the Danes call “Hygge”. Hygge is a cozy, happy and relaxed atmosphere. Live candles are an important part of creating Hygge and Christmas time is filled with candles. Some of my fondest childhood memories are from the days leading up to Christmas Eve. Being in the kitchen with my mom and dad baking cookies. Yes you heard me right, my dad always took as much a part of baking and cooking as my mother and they are both excellent in the kitchen. They would bake about 4 or 5 different types of cookies and I would do my best to get in the way to help them. Fedtebrød is one of those cookies which bring me back to Christmas in Denmark. It is a soft coconut cookie with a mild rum glaze on top.

Advent reef

Danish Christmas Tradition: Adventskransen  (Advent Reef)

The Advent Reef is a round reef typically decorated with pine, pine cones, red berries etc and four candles. It is either free standing or hung with ribbons and the colors are typically a red and white combination. The first candle is lit on the fourth Sunday before Christmas, then the first and seconds candle is lit on the third Sunday before Christmas and so on, until all four Candles are lit on the last Sunday before Christmas. I should mention that Christmas is celebrated in Denmark on the Eve of December 24th. The Advent Reef has been a tradition in almost all Danish homes since the 1930’s and it’s a celebration of what is coming at Christmas, that being the Birth of the Jesus Child. Whether you are a religious person or not, it’s a beautiful tradition to make the reef and lighting the candles every Sunday in anticipation of Christmas. It brings a sense of joy, Hygge and excitement into those hectic days.

Fedtebrød Ingredients

Fedtebrød Cookies

Ingredients:

For cookie dough:

125 gram flour (1 cup 2 tablespoons)

1/4 teaspoon baking powder

125 gram butter (9 tablespoons) cut into small pieces

65 gram sweetened coconut (3/4 cup loosely packed)

65 gram sugar (5 tablespoon)

For glaze:

100 gram powdered sugar (1 cup)

2 tablespoon water

1 teaspoon rum

1 teaspoon flour

Roll dough into cylinder

Roll dough into a rectangle

Directions:

Preheat oven to 200 degrees C ( 392 degrees F ) and line a large baking sheet with parchment paper.

Place flour, baking powder, butter, coconut and sugar in a medium bowl and mix with a hand-held mixer. The mixture will be crumbly. Dust flour on working surface and on your hands. Then press mixture together using your hands until it forms a ball of dough. Divide dough into three balls of dough. Using your hands, form ball of dough into long rolls approx 9 x 1 inch long. Place on floured surface and using your rolling-pin gently roll dough into a 12 x 2 1/2 – 3 inch rectangle. Move the dough (with the help of a spatula) onto prepared baking sheet and using your hands and spatula press dough edges to make a more uniform edge. Repeat with two remaining dough balls.

Bake until golden brown, approx 10 minutes. Remove from oven and let cool on baking sheet for 4-5 minutes. While cookies are cooling, mix glaze together. While cookies are still warm, spread the glaze over cookies. Cool for another 4-5 minutes and then cut cookies diagonally. Complete cooling on baking sheet.

Glædelig Jul and Merry Christmas♥

Put glaze on while still warm

Cut diagonally

Source: adapted from my Mother’s recipe

Print

Danish winter sky

Starting on Monday November 1st I will be posting “12 Days of Christmas”. Christmas is a magical time of year for me, my favorite time of year, and I would like to share with you some of my most treasured Christmas foods which bring back many wonderful memories. It will be a mix of Danish/American Christmas items and the posts will be running through the middle of December. I hope you enjoy these posts as much as I have enjoyed creating them.

Julestjerne

Julestjerne

Chicken Stock


Making Chicken Stock

Making Chicken Stock

Lets make Chicken Stock. This is definitely worth your time and effort, and really, it’s no trouble at all. Simply add all ingredients to a large stock pot, add water, let it simmer, cool down and freeze…easy. You get the most flavorful and aromatic stock you can imagine and even better, you get to control the amount of salt, not to mention, no chemicals in your stock. You can vary the flavor of your stock by adding different veggies and herbs, this time I added Rutabaga and it was wonderful. But if you can’t find Rutabaga you could use Turnips, Parsnips or whatever you like.

A note about fat, I like to separate it out from the stock by using my fancy fat separator thing-a-ma-jing, but it is not necessary at all. If you freeze it with the fat, the fat will actually help create a seal and after thawing it in the refrigerator you simply just lift the fat off the surface before using the stock. No need for a fancy fat separator…but I like mine 🙂

Chicken Stock

Ingredients:

1 whole chicken, pre-cut into breasts, thighs and wings. Giblets discharged.

3 large carrots, cut into large chunks

3 celery stalks, cut into large chunks

2 large onions, quartered

1 large parsnips, cut into large chunks

1/2 rutabaga, cut into large chunks

a small bunch fresh thyme (10-12 sprigs)

2-3 bay leaves

1 teaspoon whole black peppercorns

Directions:

Place chicken, vegetables and all herbs in a large stock pot. Pour in only enough cold water to cover, about 3 quarts. Bring it to a slow boil and then lower heat to medium-low. Cover partially and simmer for 1 1/2 hour or until chicken is done. As the chicken cooks, skim away impurities that rise to the surface. Add a little more water, if necessary to keep chicken covered while simmering.

When done, remove chicken pieces to a large Tupperware. Let cool slightly and then cover and place in refrigerator. Once completely cooled, discard skin and bones and place meat back into storage container.

Strain the stock through a fine sieve into another pot to remove vegetables. Use stock immediately or if you plan on storing it, let it cool down and refrigerate for up to one week or freeze 2-3 months.

Strain out veggies

Chicken Stock

Source: adapted from The Cook’s Encyclopedia of Soup

Print

A Game Of Tag

orangewweb

I got tagged, so I guess that means I’m it. There is a fun game going around the Food Blogging community and Kim from Liv Life has challenged me for a game of Tag. The person tagged answers 8 questions and then tags another eight Bloggers with a new round of questions. So here are the questions that was posted to me by Kim:

1.   What is your favorite restaurant? I thought about this question for quite a while and I have to answer this question in  two parts. The all-time best meal I have ever had was at the 1587 restaurant located inside The Tranquil House Inn in Manteo, North Carolina. But we have only eaten there once and it’s a 2 hour drive from where we live. But if it has to be a local restaurant it would probably be a toss-up between P F Chang’s or Carrabba’s. Love them both.

2.   When dining out do you prefer a fancy, dress up affair or casual with flip-flops? Well, I don’t know about flip-flops but I do know that I do not like to dress up at all. I am a semi-casual kinda girl living in a semi-casual kinda world.

3.   Do you do fast food? If so, what is your favorite? Yes, I am guilty of fast food desires but I try to keep it a minimum. My favorite would be Subway. Is Subway really considered fast food? Well if not, then I’ll go with Five Guys Burger. That is definitely a heart attack on a plate.

4.   Do you remember one of the first recipes that you ever made? If so, do you still make it? Yes, it was a Danish version of Marble cake. I made it all the time when I was a young girl back in Denmark. Funny you should ask, because as I am sitting here typing this the aroma of that cake is filling the kitchen…it’s fresh out of the oven and I’ll be posting about it pretty soon.

5.   The world is open to you. A personal private jet with pilot is waiting for your direction…. Where will you go? I had to think about this one for a while. I would want to go somewhere really unique and interesting and this is an area that fascinates me. Now brace yourself and put on your best winter gear for I would want to go to Antarctica! Can you imagine what an adventure it would be? Oh and I would want to winter-over as well…just to test myself. What a great question Kim.

6.   How close do you live now from where you were born? For this I had to consult with the great world-wide web and it turns out that I live 3977 miles from where I was born in Denmark. Long way from home!

7.   Wine…red, white or bubbly? White.

8.   Why did you start blogging? Before I even knew there was such a thing as food blogging, my kitchen and Den was littered with food magazines and cookbooks (actually still is). And then one day I read in a magazine about something called a food blog and when I went on the computer and checked it out, I was fascinated. And then I discovered that there was an entire food blogging community and I was in seventh heaven. My husband was the one who suggested that I should start my own blog and I thought it was a brilliant idea even though I knew nothing about how to make a web page. But after a lot of reading up on it…here we are…My Danish Kitchen and I  🙂

I must say that it was really a fun activity to take part in this game of Tag. And now it is my turn to Tag eight other bloggers with a new round of questions.

honeydewwweb

Here are my eight questions:

1.   If your house was destroyed and you could only rescue one kitchen utensil from your kitchen, which one would it be?

2.   What is your favorite Holiday? and why?

3.   What is your favorite go to dish, to cook or bake?

4.   When you need a little me-time how do you prefer to relax?

5.   What type of food or dish are you the most intimidated by?

6.   How close do you live now from where you were born?

7.   If the world was your oyster and time and money were of no concern, where in the world would you like to travel to?

8.   Why did you start blogging?

I would like to Tag:

Tes from Tes At Home

Kathy from Polwig

Staci from Eating in Denmark

Julie from Mommie Cooks

Patty from Patty’s Food

Sarah from Baking Serendipity

Christina from Sweet Pea’s Kitchen

Debbie from Squirrel Bakes

If you are not interested in participating, no big deal. I understand that this is not for everyone.

Fusilli Col Buco And Shrimp In Tomato Cream Sauce

Fusilli Col Buco And Shrimp In Tomato Cream Sauce

Ok, so I admit it, I’m hooked on Tomato Cream sauces. Ok ok, here is the real truth, I’m hooked on anything tomato. Tomato sandwiches, tomato soup, tomato sauces or just a plain tomato with salt and pepper, yum. I think maybe Joe (my husband) is getting a little tired of my love affair with tomatoes, although he really did like this Tomato cream sauce. And did you see these beautiful Fusilli Col Buco that I found. I have been saving them for a special tomato sauce and this is it. Hope you enjoy this recipe, should you decide to give it a try.

Fusilli Col Buco And Shrimp In Tomato Cream Sauce

Ingredients:

2/3 pound Fusilli Col Buco

1 pound extra-large Shrimp

2 tablespoon Butter

2 tablespoon Olive Oil

1 small Onion – diced

2 cloves Garlic – minced

1/2 cup white wine

1 can Tomato Sauce, 8 ounces

1/2 cup Whipping Cream

fresh Basil, to taste

Salt and Pepper, to taste

Directions:

Peel, devein and rinse shrimp. Cook Fusilli Col Buco until desired consistency. Meanwhile, heat 1 tablespoon butter and 1 tablespoon olive oil in a large skillet. Season shrimp lightly with salt and pepper and cook in skillet until pink. Do not overcook. Remove shrimp from skillet and set aside. Add remaining 1 tablespoon butter and 1 tablespoon olive oil to skillet, then add diced onion and minced garlic and cook over low-medium heat until tender. Add wine and let it reduce for 4-5 minutes. Add tomato sauce and cream, stir well and bring to a simmer. Chop fresh Basil and add to sauce, then add drained Fusilli Col Buco and Shrimp back into the sauce and stir well to make sure Fusilli is completely covered with sauce. Serve hot with grated Parmigiano Reggiano cheese. Enjoy!

Cooked Shrimp

Fusilli Col Buco in Tomato Cream Sauce

Source: adapted from Pioneer Woman

Print

Pandekage (Crepe) With Strawberry Yogurt

Pandekage (Crepe) With Strawberry Yogurt

Have you ever walked into an old-time ice cream parlor where they make the waffle cones fresh? It is one of the most pleasing aromas I can think of. When I make these pancakes the scent of sweet vanilla fills the entire house and it smells just like the ice cream parlor I remember from back home.

Crepes in Denmark is referred to as pancakes and the typical Danish way to eat these, is with a light sprinkle of sugar, then rolled up tightly and dipped in either strawberry or raspberry jam. You get a slight crunch from the sugar and the sweet vanilla flavor is simply wonderful. For this post, I also made a yogurt filling and served it with fresh sliced strawberries which everyone really liked as well.

Pandekager or Crepes can be a little tricky to make and usually the first one falls apart, but don’t let that stop you, after making a couple of crepes you’ll be a turning them out faster than you thought possible.  They are truly wonderful and I hope you enjoy them, should you decide to try them.

Crepe with Yogurt and sliced Strawberries

Pandekager (Crepes)

Crepes Ingredients:

3 eggs

5 tablespoons sugar

1 teaspoon vanilla sugar

10 tablespoons flour

1 1/2 cup buttermilk (kærnemælk)

1 cup milk

Yogurt filling Ingredients:

1 cup vanilla yogurt

a pinch ground cinnamon

6 ounces seedless strawberry jam

1/2 quart fresh strawberries, sliced

Eating Pandekager/Crepes the Danish way:

Sprinkle Pandekage/Crepe with a light coating of sugar, roll up and dip in strawberry or raspberry jam. Delicious.

Directions:

Combine eggs, sugar and vanilla sugar, beat on high-speed until lighter in color. Add flour, buttermilk and milk, beat on medium speed until combined and free of lumps.

Heat a small non-stick pan. Add butter to coat and pour batter into the center of pan and swirl to spread evenly. Cook until golden and flip. Continue to cook the other side until golden and remove from pan onto a large plate to stack.

For filling: mix together yogurt, cinnamon and strawberry jam. Place yogurt mixture in center of crepe and top with sliced strawberries. Roll crepe up and enjoy.

Note: if you have left-over crepes, you can place parchment paper in between each crepe and stack them. Store in a sealable bag in refrigerator for several days or in freezer for up to two months.

Pandekager rolled with sugar and dipped in jam

Source: My Danish Kitchen

Print