Risengrød
Danish Christmas Tradition: Nissen (a mythical creature of Scandinavian Folklore)
The Danish Nisse is a fictional character which has its roots from the 1800’s farming community. Nissen would help with the successful drift of the farm, that is, if you were respectful of the nisse and if you behaved yourself. A special dish which were served for Christmas is Risengrød. It may not seem special by todays measure, but back then milk, rice, butter, sugar and cinnamon was a commodity. And so, it makes sense that Nissen would be part of a festive event like Christmas.
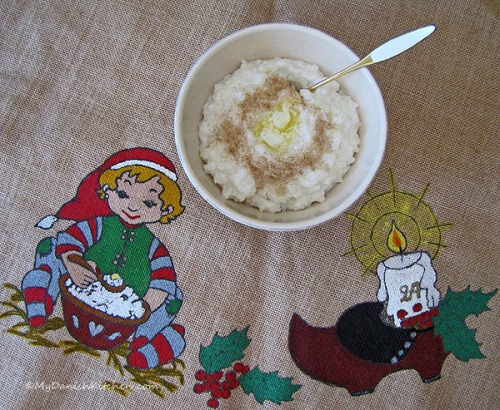
Today, the Nisse folklore is still alive and well, but in a different way. Songs have been written about the Nissen and he’s often seen in Children’s Christmas calendars whether it be on TV or on paper. He is an important part of decorating for Christmas in Denmark and Risengrød is still his favorite meal. In the picture above, which is part of my Christmas Tree skirt, you can see the Nissen getting ready to eat his Risengrød.
")
Risengrød
Ingredients:
1 1/4 cup water
1 cup rice (Grødris)
4 1/2 cup milk
1/2 teaspoon salt
1 teaspoon vanilla sugar
butter
sugar
cinnamon
Directions:
Place water and rice in a medium cooking pot, cover with a lid and simmer for 2 minutes. Add milk, salt and vanilla sugar and simmer covered over low heat for 40-45 minutes. Stir often to make sure the milk does not burn, especially the last 30 minutes. You may have to turn the heat all the way down as low as your stove will allow for the last 15 minutes.
Mix sugar and cinnamon together according to your taste. Serve the Risengrød warm, sprinkled with sugar/cinnamon mixture and place a dollop of butter in the center, letting the butter melt.
Glædelig Jul and Merry Christmas♥
Source: My Danish Kitchen