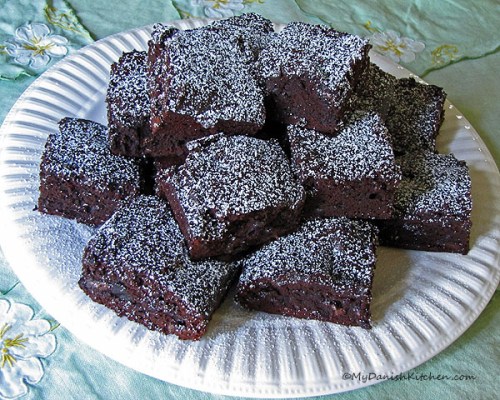
Feeds:
Posts
Comments

Archive for July, 2010

Blondies

Blondies

My first encounter with Blondies….ever, was one day recently when I came home from work and found my son Nicholas and his friend Jessica cleaning up the kitchen after having made a batch of Blondies. (Did you notice that I said; they cleaned up the kitchen 🙂 ) I gotta tell you, coming home after a long day at work to the scent of baked goods; I could get use to that. But seriously, the Blondies were absolutely fantastic and the kiddies did an excellent job. These Blondies turned out light and cakey with a wonderful brown sugar flavor. Blondies definitely have more fun!

Update: I was wondering if it’s really necessesary to have two whole sticks of butter in this recipe, it just seems like way too much butter for me. So I decided to try with just with one stick and the Blondies turned out fantastic. I have adjusted the recipe to just one stick of butter and now I can eat Blondies with less guilt.

Ingredients:

1 1/2 cups all-purpose flour

1/2 teaspoon baking powder

1/4 teaspoon salt

1/2 cup (1 sticks) unsalted butter, softened

2 cups firmly packed light brown sugar

3 large eggs, at room temperature

2 teaspoons vanilla extract

3/4 cup white chocolate chips

3/4 cup semi-sweet chocolate chips

Directions:

Preheat oven to 350 degree F. Line a 9 x 13 inch baking pan with parchment paper so it extends over the long edges of pan. Spray with cooking spray.

In a medium bowl, mix together flour, baking powder and salt; set aside.

In the bowl of an electrical mixer, using the paddle attachment, beat the butter and brown sugar at medium speed until light in color and texture, about 2 minutes. Scrape down sides of bowl. Beat in eggs one at a time, beating well after each addition. Beat in vanilla extract. At low speed, mix in the dry ingredients just until combined. Using a wooden spoon fold in white and semi-sweet chocolate chips.

Scrape batter into prepared pan and smooth the top. Bake the bars for 35 to 40 minutes, until they are golden brown and a toothpick inserted into center comes out clean; do not overbake. Cool completely in pan on a wire rack. Once cooled completely, lift up the parchment paper to remove the bars from pan. Cut into squares.

Source: adapted from The Good Cookie by Tish Boyle

Print

Read Full Post »

Excellent Meatballs

Excellent Meatballs

I have been trying and trying for years to make a tender and tasty meatball but they always came out too firm. I want my meatballs to easily fall apart when you dig into it with a fork. So what was different this time you ask me ? Well, I think the most important part is that I got equal parts veal, pork and beef directly from the butcher instead of using one of those “meatball” ground meat packages from the grocery store that supposedly have equal parts of all three meats in it. Also, the meatballs get browned and then baked plus I like to let them simmer in the sauce for at least 1 hour. These meatballs are so tasty and Anne Burrell also mentions another really important point and that is to test taste (why didn’t I think of that) a mini meatball before cooking them all up. Adjust the salt if needed! Now finally I got myself a tender meatball that I’ll be confident in serving for my guests.

Ingredients:

Extra-virgin olive oil

1 large onion, finely chopped

salt

2 cloves garlic, minced

pinch of crushed red pepper

1/2 pound ground beef

1/2 pound ground pork

1/2 pound ground veal

2 large eggs

1 cup grated Parmigiano

1/4 cup finely chopped fresh Italian parsley

1 cup breadcrumbs

1/2 cup water

Directions:Coat a large pan with olive oil, add the onions and bring to a medium-high heat. Season the onions generously with salt and cook for 5-7 minutes. The onions should be translucent but have no color. Add the garlic and crushed red pepper and saute for another 1-2 minutes. Turn off heat and allow to cool.

In a large bowl combine the meats, eggs, Parmigiano, parsley, bread crumbs and onions. Season well with salt. Mix using your hands squishing the mixture. Add water and do one final squish. The mixture should be quite wet. Test the seasoning of the mix by making a mini hamburger size patty and cooking it. The patty should taste really good.

Preheat oven to 350 degrees F.

Shape the meat into desired size. I prefer them slightly larger than a golf ball. Coat a large pan with olive oil and bring to medium-high heat. Brown the meatballs on all sides. Place them on a cookies sheet and bake them in oven for 15 minutes or until cooked all the way through. If using right away, add meatballs to your favorite marinara sauce. If not, cool and freeze.

Source:  Anne Burrell

Print

Read Full Post »

Best Marinara Sauce

Best Marinara Sauce

I love love love tomatoes and Marinara sauce. I would eat it 7 days a week if they let me. But they won’t let me. Actually, truth be told, I eat a tomato every day for lunch and my coworkers love to point it out to me and so I never hear the end of it. 🙂 But I can’t help myself, lunch just dosn’t seem right without my shiny little red friend. Sorry, got a little sidetracked there.

Now for the Marinara sauce. This is without a doubt the very best Marinara sauce that I have tried out so far. This has become a favorite in our house and I’m happy to report that even my son likes it (and that’s saying a lot because he is used to only the best from his grandmother who makes a mean pasta and meatball). If you have a food mill this is a breeze to make, if not, it’s a little more work but well worth the effort. This sauce freezes really well so I always make a big batch and keep it in the freezer for easy use. Enjoy.

Ingredients:

1/4 cup extra-virgin olive oil

1/4 pound diced pancetta

2 large Spanish onions, diced

Kosher salt

4 large garlic cloves, minced

4 (28 ounce) cans Italian diced or plum San Marzano tomatoes

Directions:

Coat a large sauce pot with olive oil and add diced pancetta. Bring the pot to a medium-high heat and cook pancetta for 4 to 5 minutes. Add onion and season generously with salt, stir to coat with olive oil. Cook the onions for 6 to 7 minutes stirring frequently. The onions should become soft and translucent but have no color. Add the garlic and cook for another 2-3 minutes stirring frequently.

Pass the tomatoes through a food mill or if you don’t have a food mill simply just pulse the tomatoes in a food processor to break them up and then press the tomatoes through a sieve. Make sure to press until you have a dry paste left in the sieve. This part can be a little bit of a workout. Make sure to scrape all the delicious pulp off the bottom of the sieve or the food mill. Add the tomatoes to the pot and rinse out 1 of the empty cans with water and add the water to the pot (about 2-3 cups). Season generously with salt (season in baby steps) and taste it to make sure it is seasoned enough. Let the sauce simmer for 2-3 hours, stirring occasionally and tasting frequently.

Serve sauce right away or cool down and then freeze.

Source: Anne Burrell

Print

Read Full Post »

Korean Skewered Chicken

Korean Skewered Chicken

I love to try new foods, new flavors. When I made this recipe it was my first encounter with the Asian Pear. The pear is absolutely delicious, so crispy, almost crunchy and sweet. Just thought I would share that with you, but this post is not about the Asian pear, it’s about these skewered chicken and they were very delicious indeed. The original recipe gives different basting instructions than what I ended up doing. The men in my life (husband and son) were hovering around the kitchen like a pack of wolves, which usually means that they’re hungry (I must admit that I was pretty hungry too), so I decided not to take the extra 10 minutes to make the basting. Instead I whipped up my own consisting of 2 tablespoons Thai style chili sauce and 2 tablespoons soy sauce and that is what I used to baste the chicken with instead, and it turned out fantastic! Did this recipe just become Thai chicken skewers instead of Korean chicken skewers? Ladies and Gents, don’t get all rowdy now but I think we just had an “A HA” moment here. Anyway, the original recipe suggest that you save the chicken marinade, strain it and simmer until it thickens and become saucy (about 5-10 minutes). Then use the sauce for the basting. Next time I make these chicken skewers, I will make the sauce the Korean way, hungry or not. I promise, maybe.

Ingredients:

1 pound boneless, skinless chicken breast (cut into bite size pieces)

3 garlic cloves (grated)

1 inch ginger (grated)

1/2 small onion (grated)

1/2 Asian pear (grated)

1/4 cup soy sauce

1/2 tablespoon sesame oil

1 tablespoon brown sugar

1 green onion (chopped)

1/4 teaspoon pepper

For basting:

2 tablespoon Thai style chili sauce

2 tablespoon soy sauce

Directions:

Mix all ingredients in a zip lock bag and marinate for 1 hour. If using wooden skewers, soak in water. Skewer the chicken on wet wooden skewers or on metal skewers and set aside. Mix 2 tablespoon Thai style chili sauce with 2 tablespoon soy sauce to make basting sauce. Grill chicken until cooked, about 5 minutes per side basting it with the marinade as you go. Enjoy

Source: adapted from Closet Cooking

Print

Read Full Post »

Blommekage

Blommekage

When I first saw this cake I knew I had to make it immediately. And this recipe didn’t lay around on the kitchen counter in my to-do pile for weeks and weeks on end, no sir, it moved right up to the top of the list. Besides, I had been eyeballing the most beautiful plums at the store. I love this cake, but, it did give me quite a bit of trouble. The first time I made it, I placed the plums at the bottom of the pan, as instructed. But when I removed the cake from the pan, some of the plums stayed at the bottom of the pan. Fiasco! But that only got me more determined to make this cake work for me. So I slept on it and decided to try it again. This time I started by placing dough in the bottom of the pan, then plums and topping it off with the remaining dough. It worked like a charm and I was very pleased with myself  🙂 The cottage cheese makes the cake itself moist and sweet which is a great contrast to the slightly tart plums. I know my pictures does not show it, but I also added a glaze to the top which turned out to be the icing on the cake (pun intended). I would recommend serving this the same day it’s baked when the cake is at its freshest.

Plum Cake Ingredients

Ingredients:

For Cake:

125 gram butter at room temperature (9 tablespoons)

225 gram sugar (1 cup plus 2 tablespoons)

4 eggs

200 gram cottage cheese (3/4 cup)

1 1/2 teaspoon lemon zest

250 gram flour (2 1/4 cup)

2 teaspoon baking powder

4 plums

1-2 cinnamon Biscotti, crumbled

For Glaze:

100 gram powdered sugar (1 cup)

2 tablespoon water

1 teaspoon rum

1 teaspoon flour

Butter and sugar, crumbly

Plum Cake with sugar on top


Directions:

Preheat oven to 175 degrees C (347 degrees F)

Plums should be pretty firm, not too soft and juicy. Cut plums into half and twist in opposite directions to separate. Cut pit out with knife. Place plums on paper towel with cut side down to absorb excess juices.

Place Biscotti in zip lock bag, close tightly and pound to crumble. Coat inside of loaf pan (5 x 9 inch) with butter and sprinkle Biscotti crumbs inside pan to coat sides and bottom with crumbs, discard excess crumbs. Set aside.

Place butter and sugar in a bowl and beat with mixer until blended well and crumbly. Add eggs one at the time, mixing well after each egg. Add cottage cheese, lemon zest and mix to blend. Stir flour and baking powder together and fold dry ingredients into batter.

Pour half of batter into prepared pan. Add plum half’s onto the batter, cut side down. Pour the remaining batter on top of plums and spread batter evenly. Sprinkle top with sugar. Bake cake in the middle of preheated oven for 60 to 65 minutes until golden brown. Let cake cool off completely before removing from pan. Once removed from pan, mix glaze and spread over top of cake. Enjoy.

Plum cake with cottage cheese

Plum Cake With Cottage Cheese

Source: adapted from Arla

Print

Read Full Post »

Lou's Baby Back Ribs

For Mother’s Day we drove up to visit my In-Laws at their house where my Father-In-Law served the most delicious Baby Back Ribs. I asked him if he would share the recipe and he was more than happy to do just that. So for Father’s Day celebration my In-Laws came down here to visit and I decided to make Lou’s Baby Back Ribs and it turned into a fun family cooking affair. We had a great time cooking the ribs together and it turned out to be a weekend filled with lots of good food as well as good company. 

This is my Fathers-In-Law’s Baby Back Rib recipe. The ribs are full of flavor and baked tender in the oven for two plus hours. At the end, the ribs are placed under the broiler to give the outside a nice crisp.  There are no set ingredient amounts, simply just sprinkle on an amount to your liking. The ribs were served with; red and white rosemary roasted potatoes and a spinach salad with heirloom tomatoes, candied walnuts, dried cranberries with a raspberry dressing. Delicious dinner! 

Baby back ribs ingredients

Ingredients: 

Baby back pork ribs 

Molasses 

Salt 

Pepper 

McCormick pork rub 

Paprika 

Dry mustard 

Brown sugar 

BBQ sauce (your favorite brand) 

Ribs with all ingredients before baking

Directions: 

Preheat oven to 300 degrees F. Remove excess fat from ribs. Coat both sides of ribs with molasses and then sprinkle a good amount of salt, pepper, pork rub, paprika and mustard. Finally press on a generous amount of brown sugar. Place ribs on a large baking sheet and cover tightly with foil. Cook in preheated oven for 2 hours and 15 minutes. Remove from oven and drain off excess liquid, then apply BBQ sauce and place under broiler for 4-5 minutes keeping a close eye, careful not to burn. 

Source: my Father-In-Law Lou 

Print

Read Full Post »

Joe's Teriyaki Shrimp

This recipe is my husband Joe’s concoction. His preferred medium to work with is metal but when he does work with food, it turns out great. His shrimps are absolutely delicious and so quick and easy to whip up. For this particular dish I prefer to use the store-bought minced garlic in the jar and dried Cilantro. These are great for grilling as well. Serve with Cocktail Sauce.

Joe's Teriyaki Shrimp with Cocktail Sauce

Ingredients: 

1 lb large or jumbo shrimp 

1/3 cup teriyaki sauce 

1/2 tsp mustard (Grey Poupon) 

1 tsp garlic 

1/2 tsp cilantro 

Directions: 

Peel deveined shrimp and place in a bowl or a zip lock bag. Add teriyaki sauce, mustard, garlic, cilantro and let marinade 10 minutes. Spray a large pan with cooking spray and preheat to medium-high heat. Place shrimp in a sieve to drain off liquid. Place shrimp in the preheated pan and cook for 3 minutes (1 1/2 minute on each side), do not over-cook. Serve with cocktail sauce.

Source: Joe Gentile at Gentile Forge

Print

Read Full Post »

Raspberry Sauce

Raspberry Sauce

This is a delicious raspberry sauce with a gorgeous red color. Perfect for brownies, cakes, pies, ice cream. Do make sure to strain out the seeds so your sauce will be smooth and not crunchy.

Ingredients:

2 pints fresh raspberries

1/4 cup sugar

1 tablespoon lemon juice

2 tablespoon raspberry liquor

Directions:

Combine raspberries and sugar in saucepan. Cook over medium heat until berries are broken down, about 10 minutes. Remove from heat. Add lemon juice and liquor. Strain through a sieve to eliminate seeds.

Source: adapted from Emeril Lagasse

Print

Read Full Post »

Chocolate Raspberry Brownies

Chocolate Raspberry Brownies

Did you know that brownies are a true American dessert, believed to have originated in the New England area. They can be either chewy, fudgy, dense or cake like. I believe that these particular brownies fall into the cake-like category. These are wonderful little brownies and served with a scoop of vanilla ice cream and freshly made raspberry sauce, they make for a perfect ending to a perfect evening or lunch, afternoon or maybe even breakfast. However, I made the mistake of using raspberry jam with seeds which result in a slight crunching when eating the brownie (a sensation which I really don’t care for). So I highly recommend seedless raspberry jam, unless of course your into the seeds kind-a-thing. Recipe for fresh Raspberry Sauce is posted separately. Enjoy.

Brownie Ingredients

Ingredients:

3/4 cup all-purpose flour

1 cup sugar

3/4 cup unsweetened cocoa

1 teaspoon baking powder

3/4 teaspoon salt

1/3 cup seedless raspberry jam

1/3 cup water

5 tablespoon butter

1 large egg

1 large egg white

1/2 cup semi-sweet chocolate chips

Directions:

Preheat oven to 350 degrees F.

Line bottom of 9 x 9 inch square baking pan with parchment paper and spray sides with cooking spray.

Combine flour, sugar, unsweetened cocoa, baking powder and salt in a large bowl, stir with a whisk. Combine raspberry jam, water and butter in a small saucepan and bring to a boil. Let jam mixture cool for 10 minutes. Add jam mixture to flour and stir well. Lightly beat together egg and egg white with a fork, add eggs to chocolate/jam mixture and stir until smooth. Stir in chocolate chips. Pour batter into prepared pan and bake at 350 degrees for 25 minutes or until a wooden toothpick inserted into center comes out with a few moist crumbs clinging to it. Cool in pan. Enjoy.

Brownie with ice cream and sauce

Brownie with ice cream and sauce

Source: adapted from Kitchen Confidante

Print

Read Full Post »

Gosh Darn Delicious Hamburger

Gosh Darn Delicious Hamburger

Hamburger season has officially arrived and with your favorite beer safely secured in one hand, fire up your grill with the other. If this is complicated, put the beer down for just one minute so you can use both hand to fire up your grill. We are all about safety here at My Danish Kitchen. 🙂 So, do you really need a recipe for a hamburger ? Maybe some do, but most of you probably don’t. Anyway, this hamburger just turned out so gosh-darn-delicious and with my camera sitting within reach I just had to take a picture of it, and the rest is history. Enjoy and Happy Grilling.

Ingredients:

1-1/2 pound ground beef

1/4 medium onion, finely diced

1 clove garlic, minced

Parsley 1-2 tablespoon, chopped

1 teaspoon salt

1/2 teaspoon pepper

1 teaspoon steak seasoning

Directions:

Add the chopped onion to a small pan with a little olive oil, cook over low heat to caramelize onions. When almost done add the garlic for 1 minute until fragrant. Let cool. Place ground beef into a medium bowl and add parsley, salt, pepper, steak seasoning and cooled onion/garlic mix. Now roll up your sleeves and with clean hands dive into the meat mixture and squish it all together. Once thoroughly mixed, form thin patties slightly larger than your bun size to allow for shrinkage during cooking. Sprinkle the outside of patties with a little salt, pepper and steak seasoning. Cook on your grill and serve with your favorite toppings. Enjoy.

Gosh darn delicious Hamburger

Ready for grilling

Source: My Danish Kitchen

Print

Read Full Post »

%d bloggers like this: